Travel Test Maven Integration & Dependency Management

Business Scenario
Welcome!
To the QA Automation Team at TravelTest Pvt. Ltd.
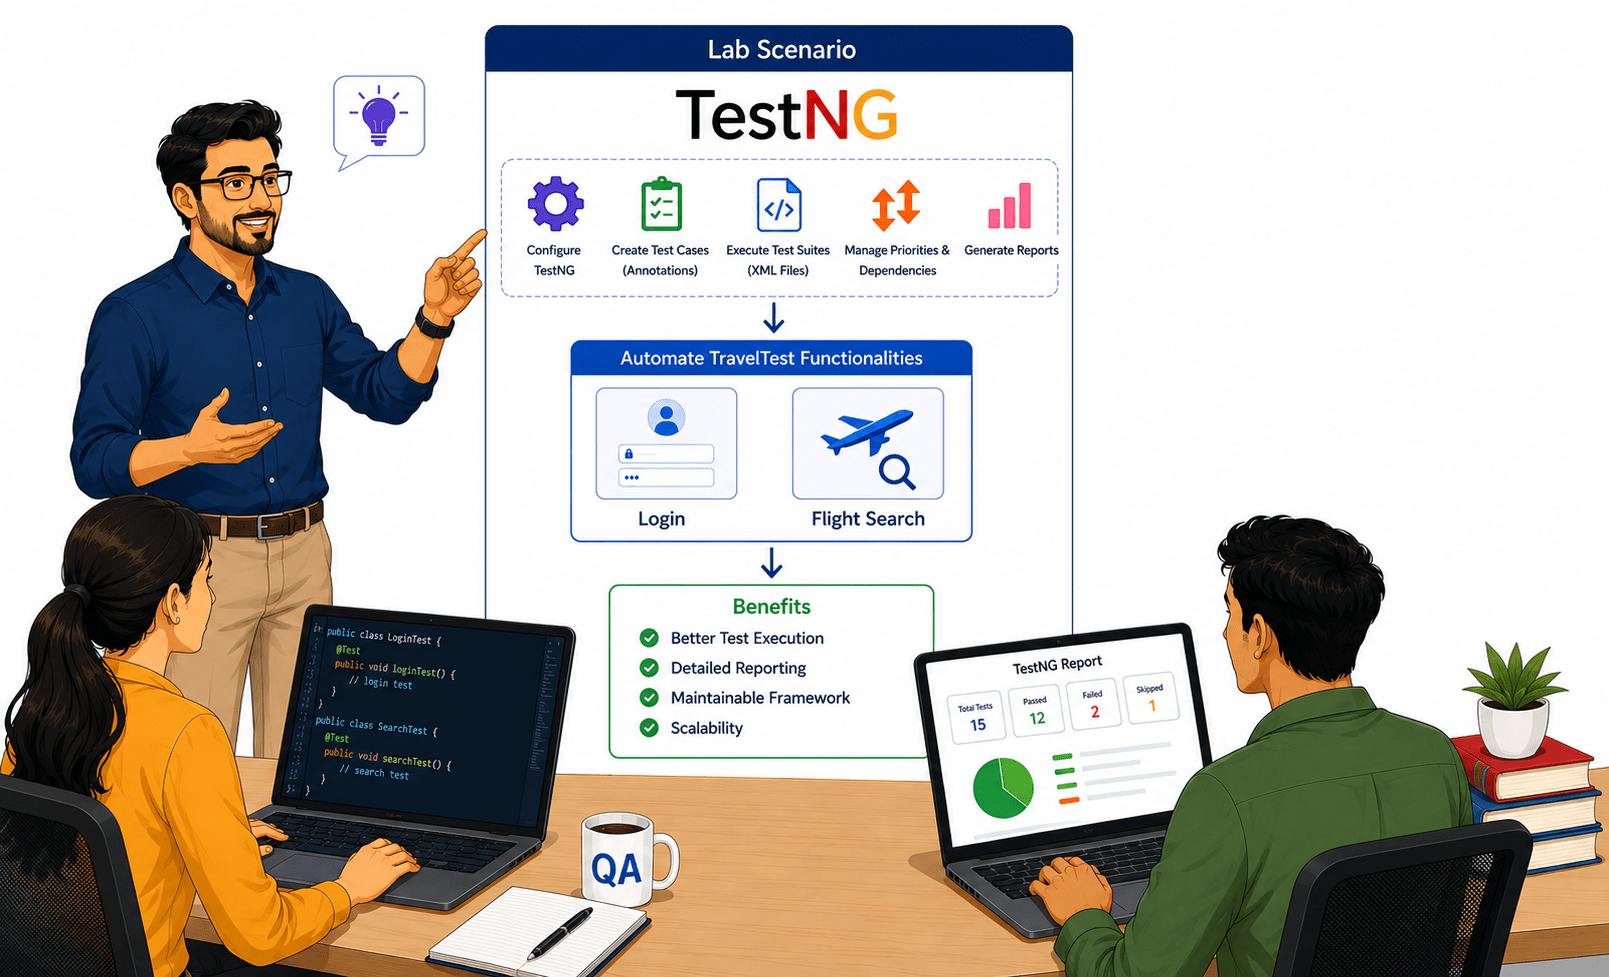
The QA Manager has assigned you the task of implementing the TestNG framework for the TravelTest automation project. As part of this lab, you will configure TestNG, create test cases using annotations, execute test suites through XML files, and manage test priorities and dependencies.

Pre-Lab Preparation
Topic: TestNG Integration
1)TestNG Annotations
2)Assertions and Reporting
git pull origin branchNameGit Pull

You will automate TravelTest functionalities such as login and flight search while improving test execution, reporting, and framework maintainability using TestNG.
Task 1: Configure TestNG
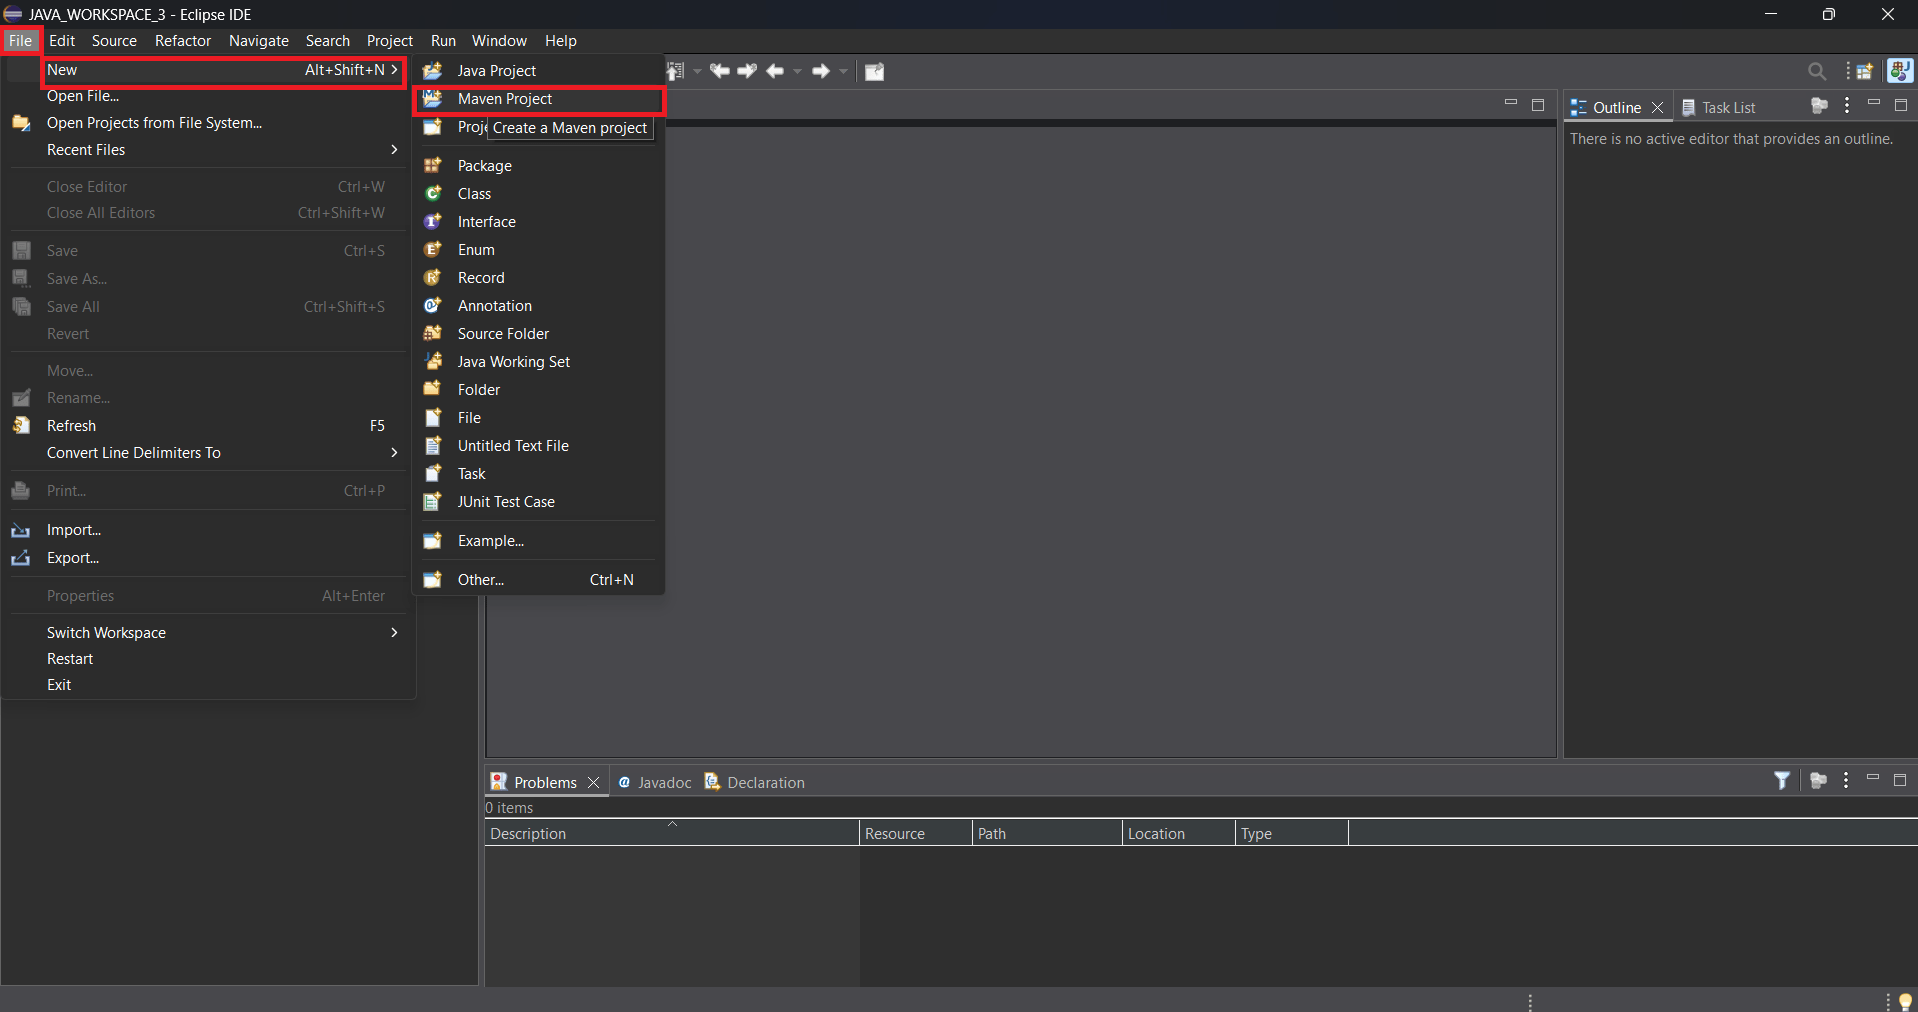
Click File, New, and Maven Project to create a new Maven project in Eclipse.
1
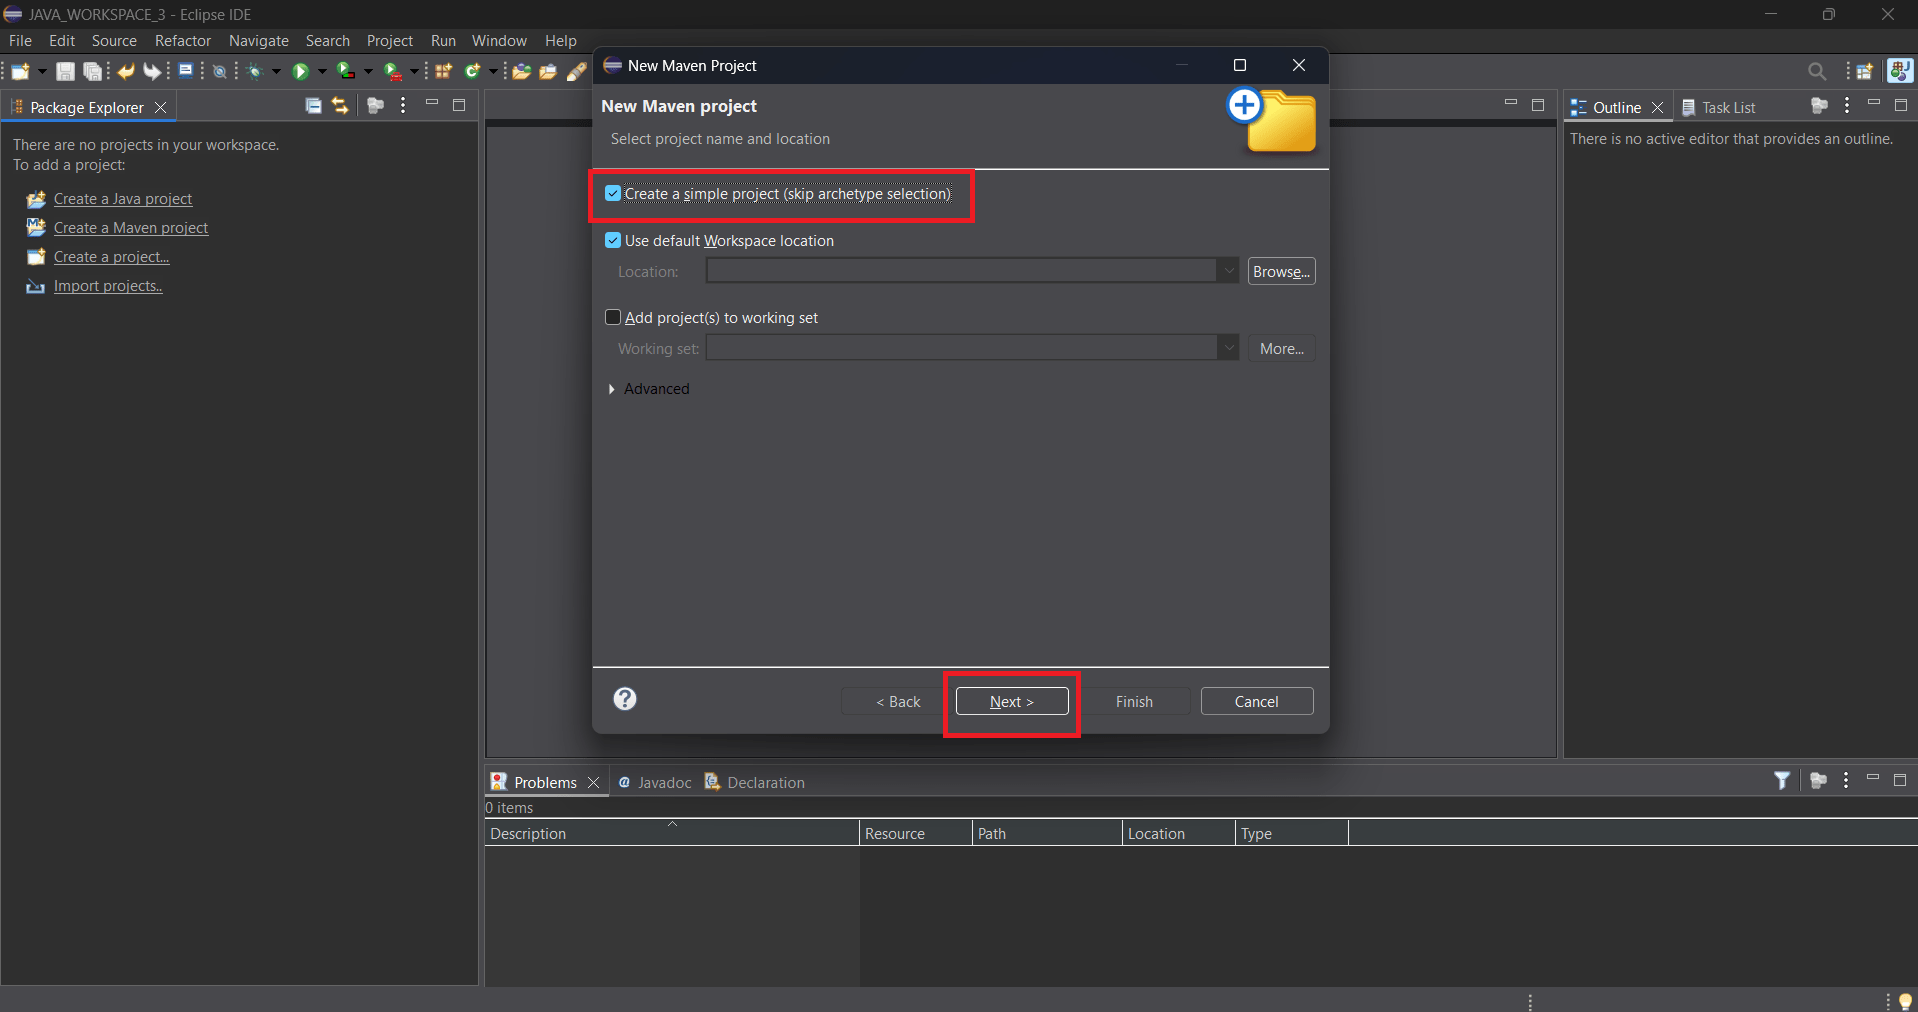
In the New Maven Project window, select Create a simple project (skip archetype selection) and click Next to proceed with creating a basic Maven project without using a predefined project template.
2
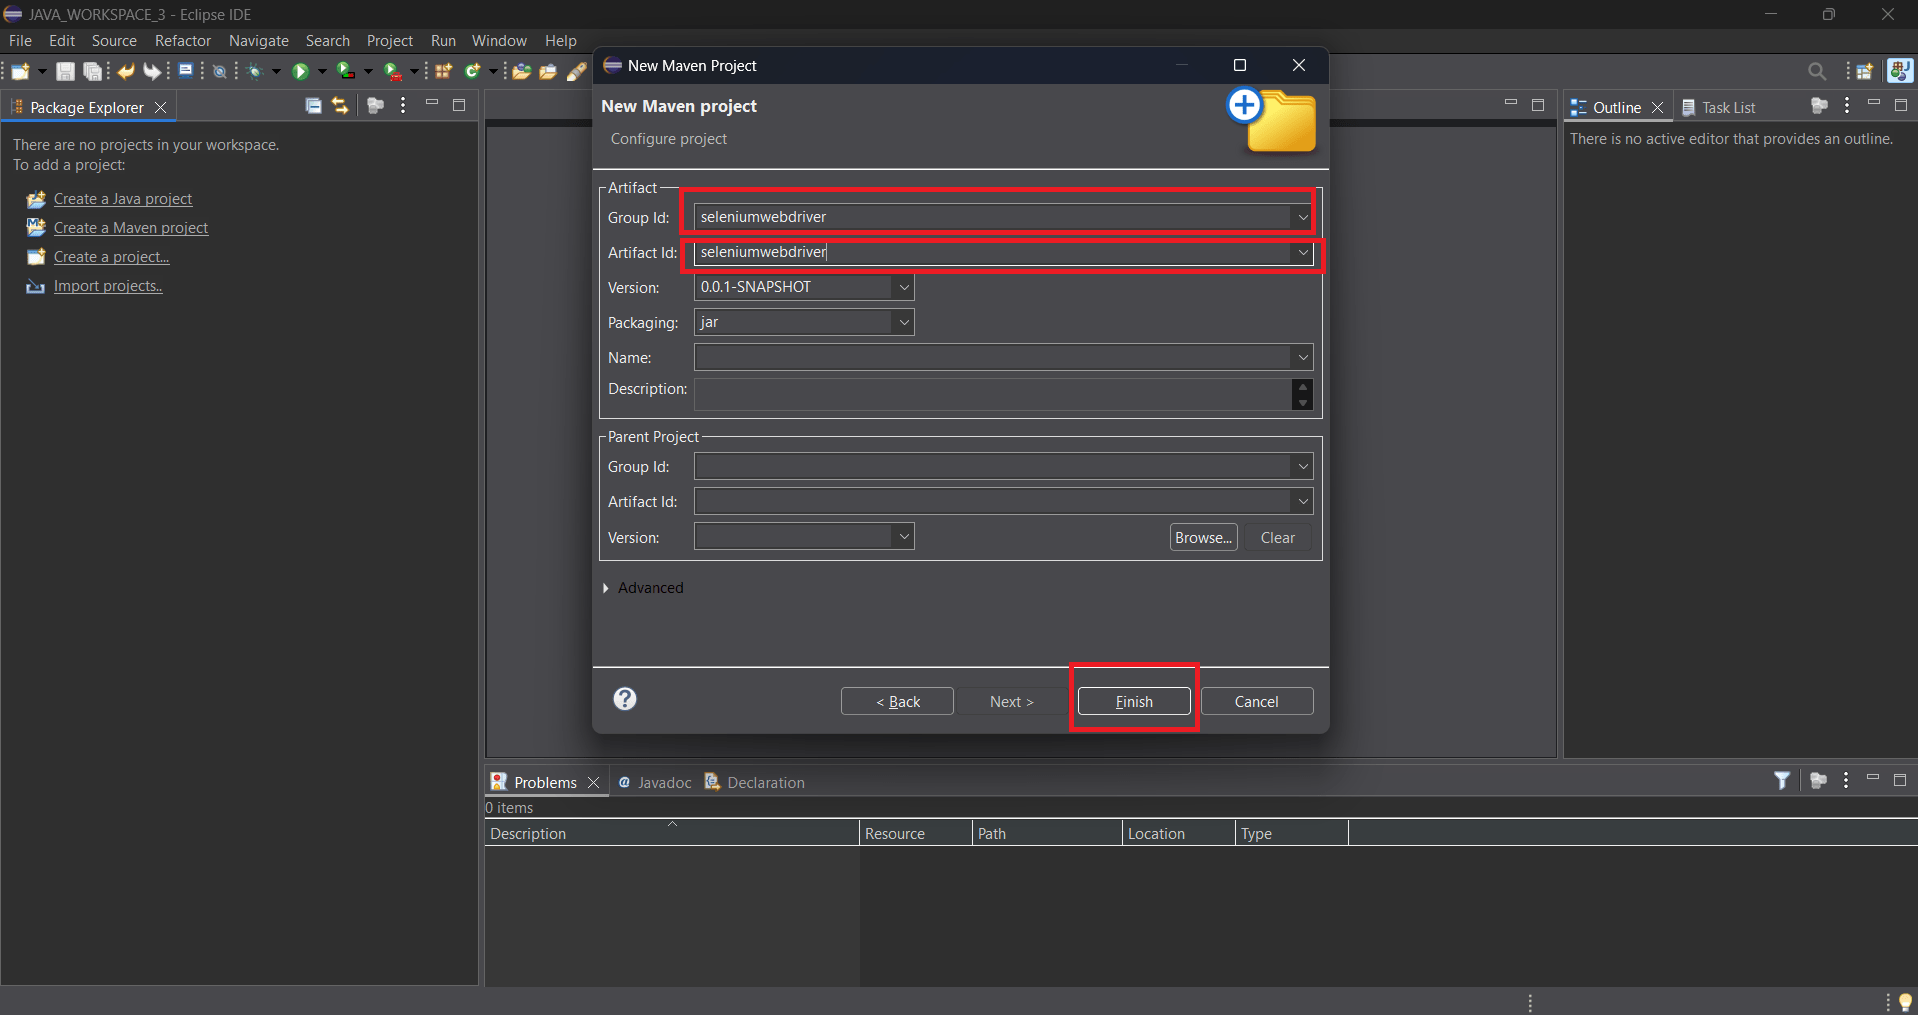
Enter the Group Id and Artifact Id for the Maven project, then click Finish to create the project and generate the default Maven project structure in Eclipse.
3
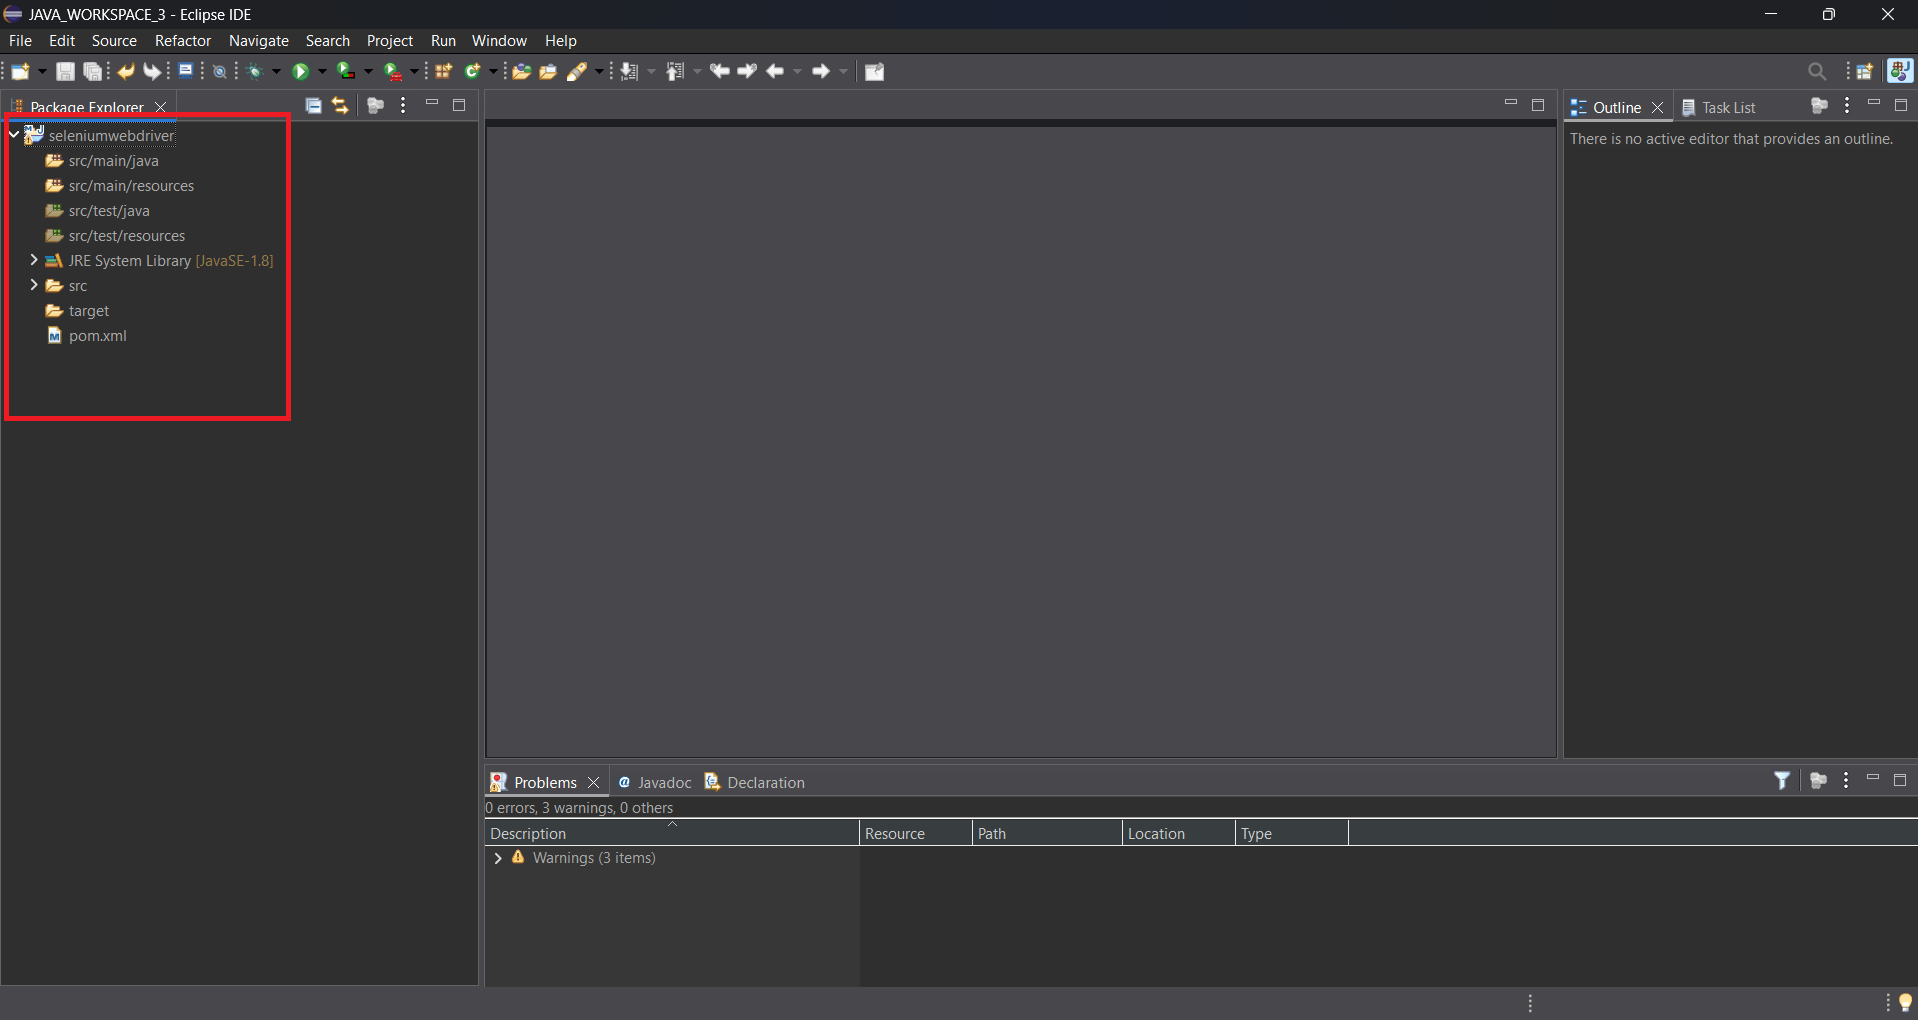
After clicking Finish, Eclipse creates the Maven project and displays the project structure, including source folders, the JRE System Library, and the pom.xml file used to manage project dependencies.
4
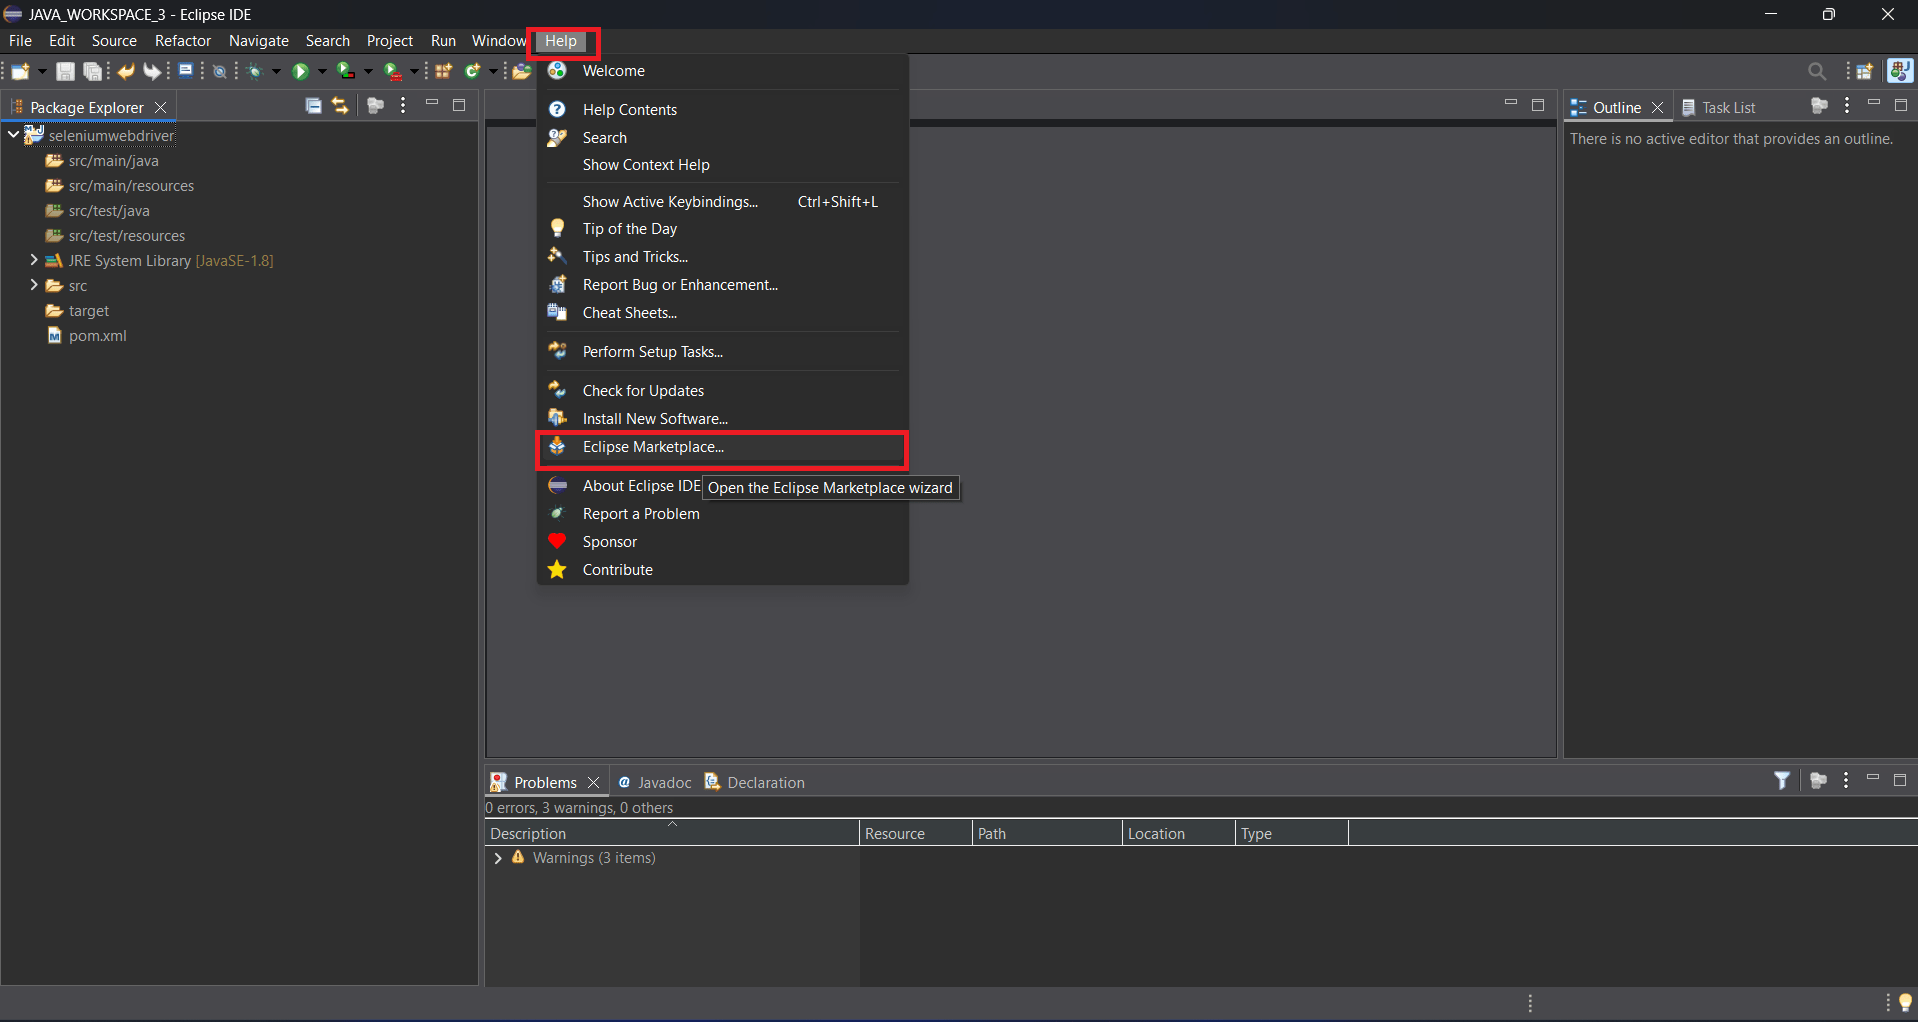
Click Help and select Eclipse Marketplace to open the Eclipse Marketplace wizard, where you can search for and install additional plugins such as TestNG.
5
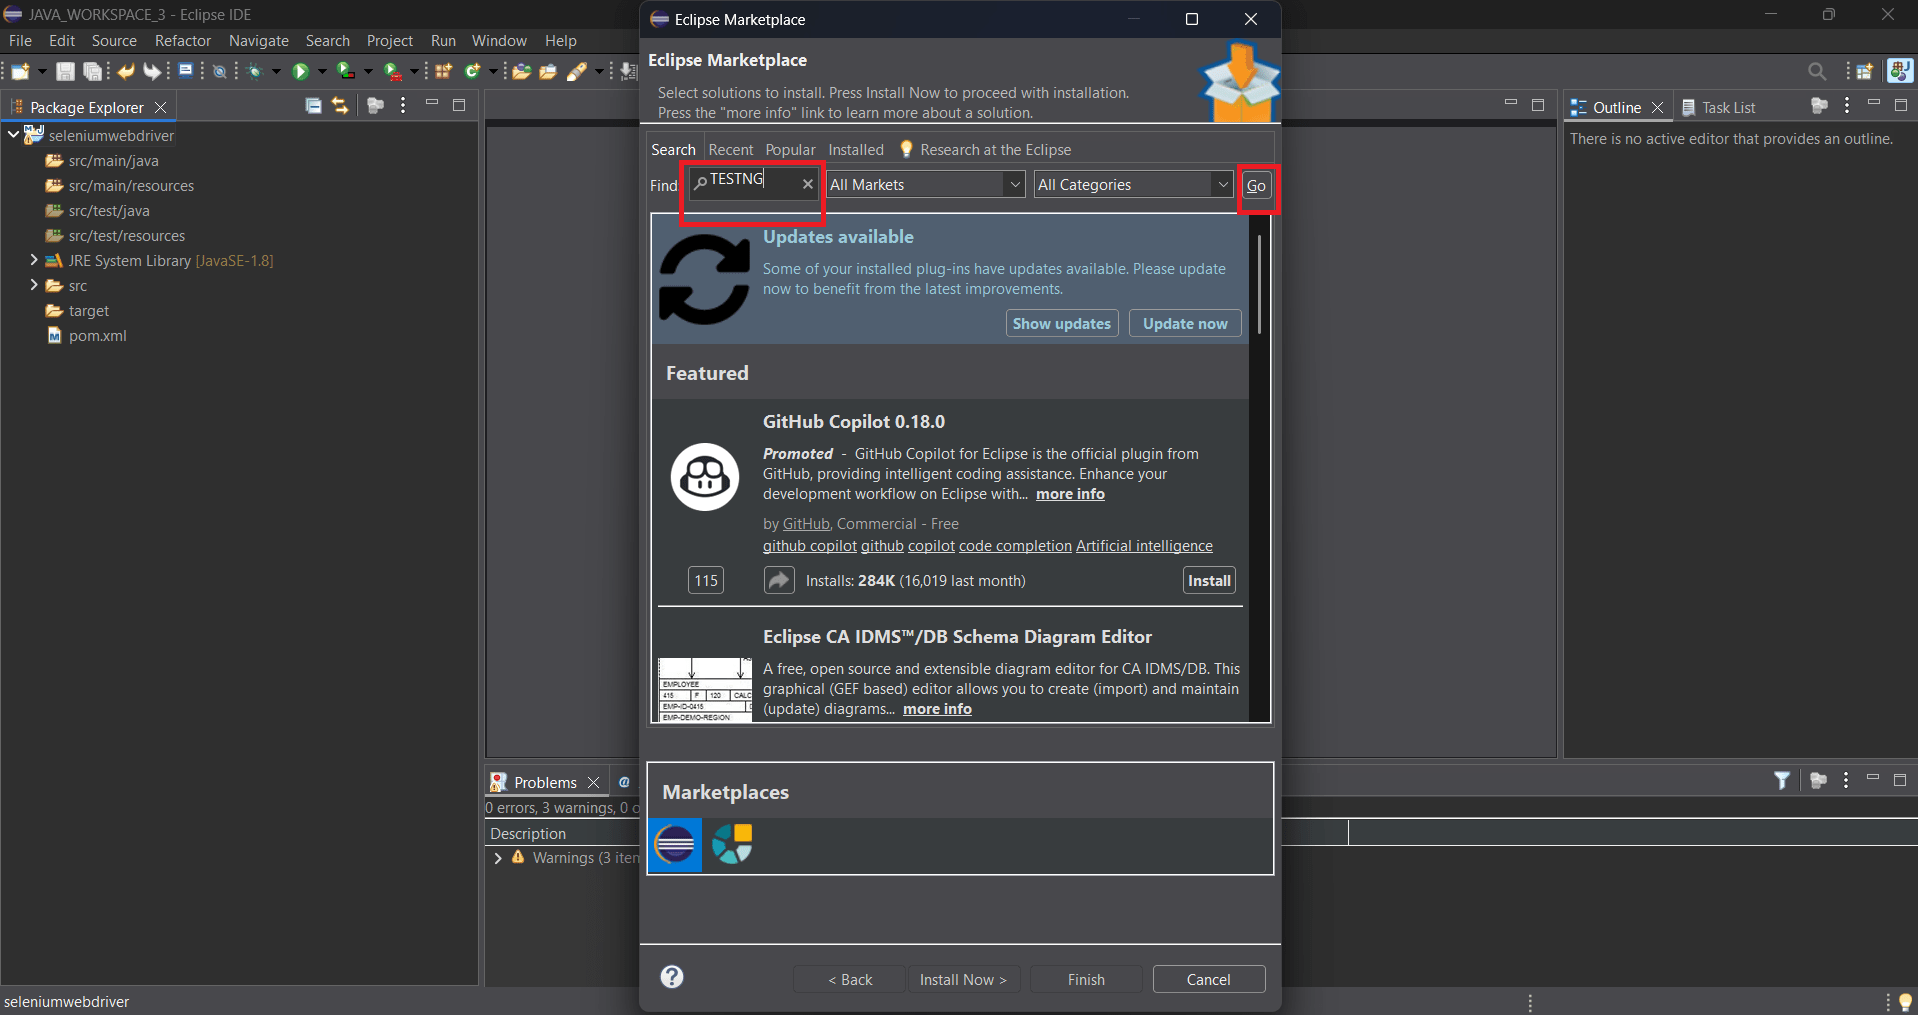
In the Eclipse Marketplace window, enter TestNG in the search box and click Go to search for the TestNG plugin available for installation.
6
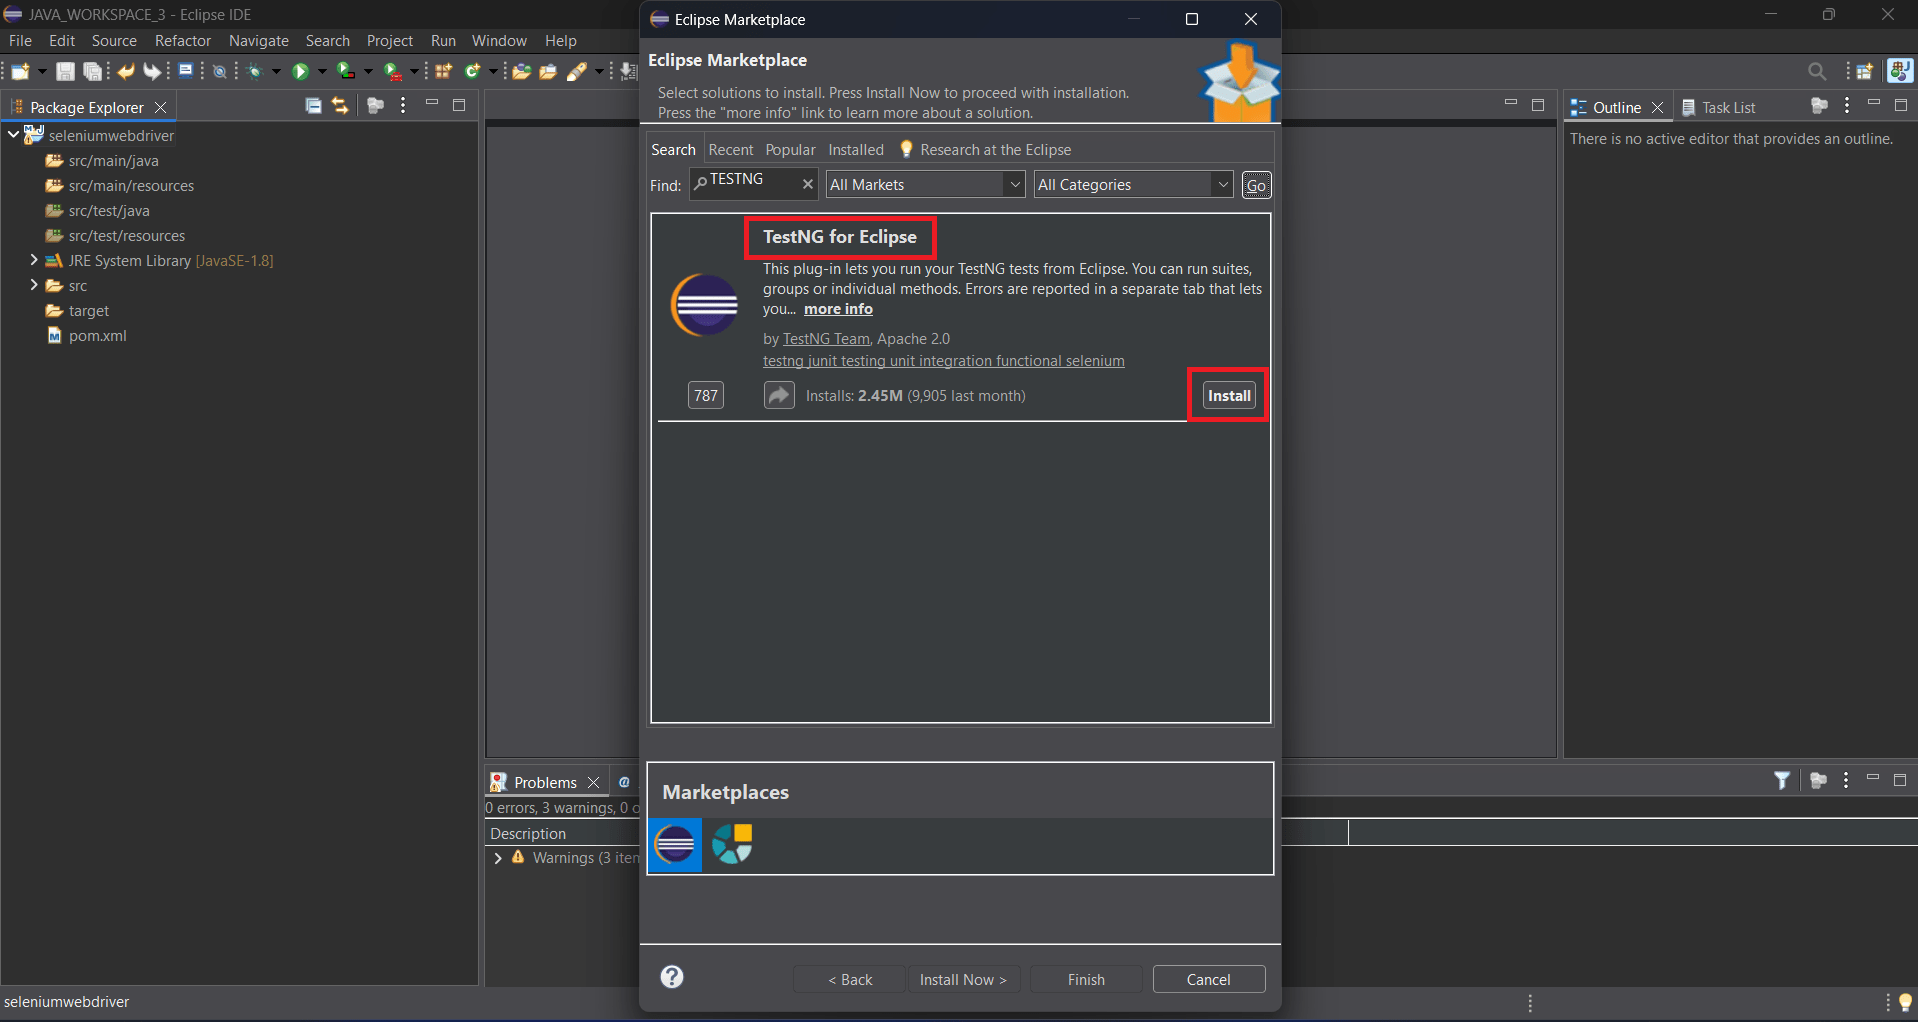
From the search results, locate TestNG for Eclipse and click Install to begin installing the TestNG plugin, which enables the creation and execution of TestNG test cases directly within Eclipse.
7
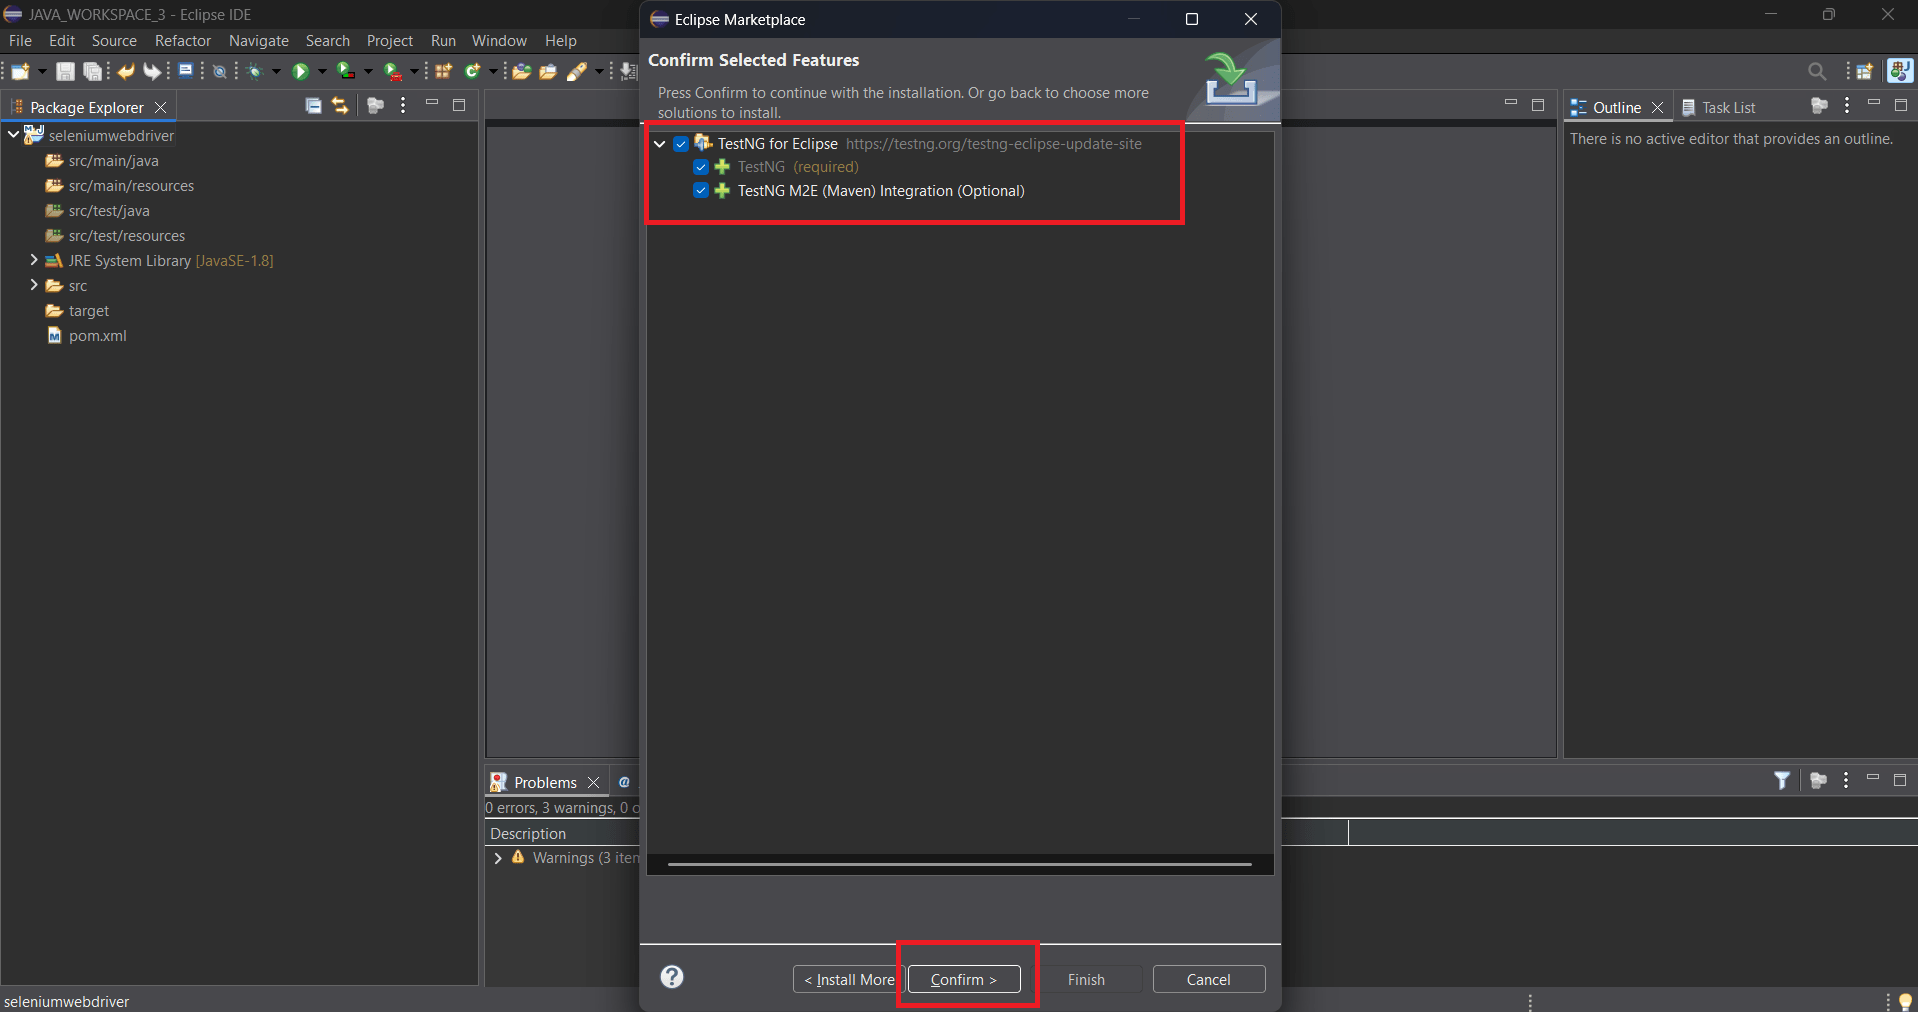
In the Confirm Selected Features window, verify that the required TestNG components are selected and click Confirm to continue the installation process.
8
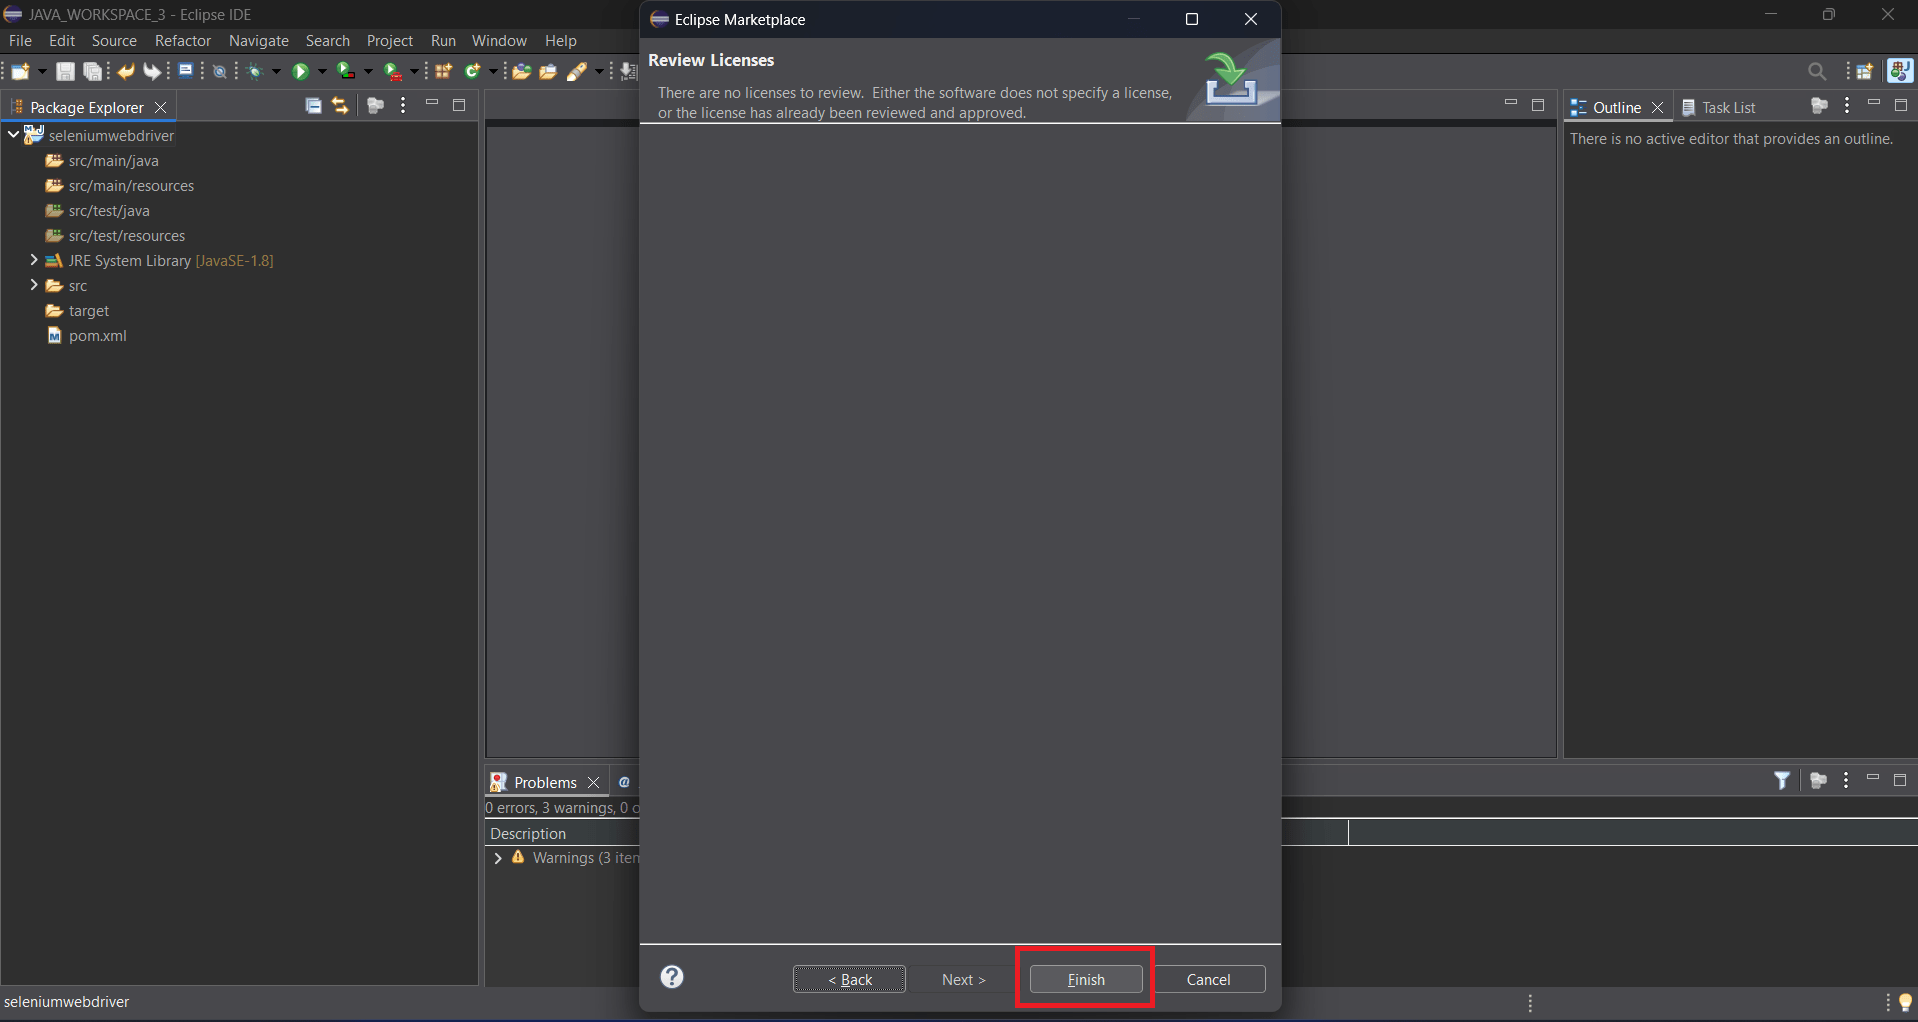
In the Review Licenses window, review the installation details and click Finish to start installing the TestNG plugin into Eclipse.
9
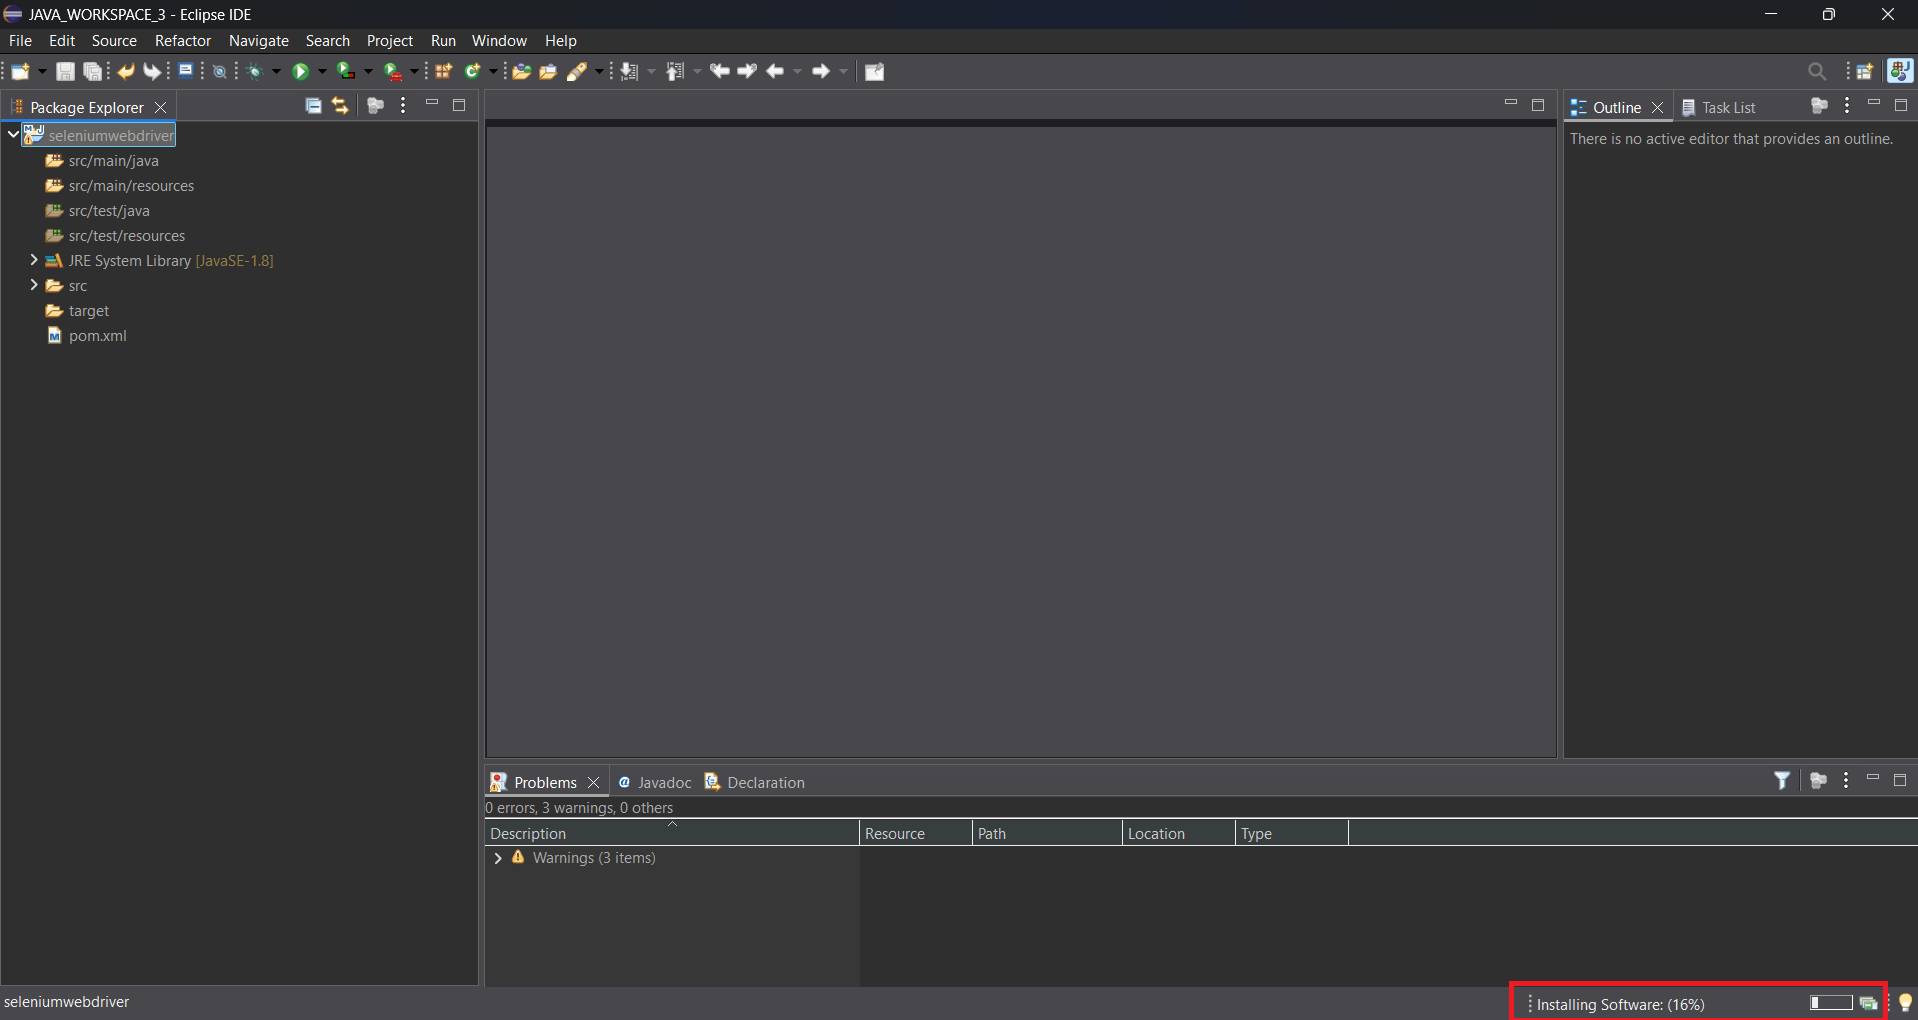
After clicking Finish, Eclipse begins downloading and installing the TestNG plugin. Wait for the installation to complete before proceeding to the next step.
10
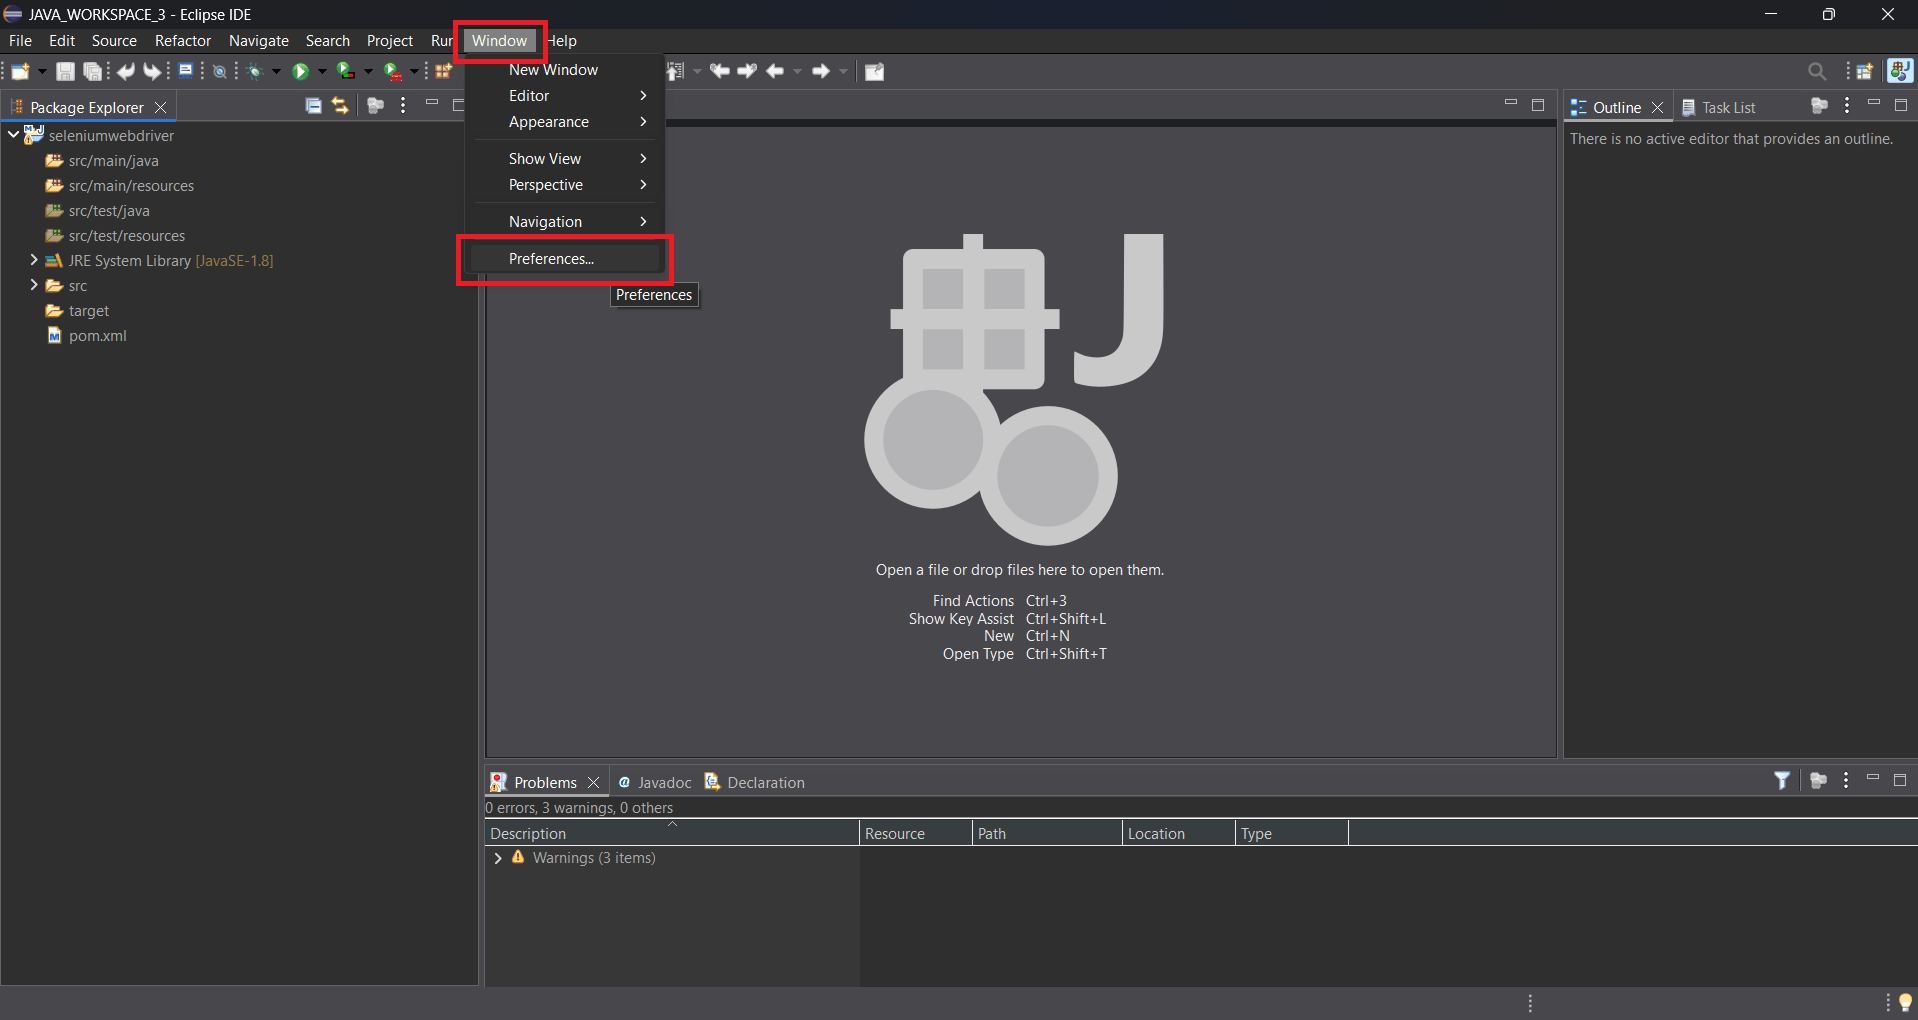
After the installation is complete, click Window and select Preferences to verify that the TestNG plugin has been successfully added to Eclipse and is available in the IDE settings.
11
In the Preferences window, verify that the TestNG option appears in the left panel, confirming that the TestNG plugin has been installed successfully; then click Apply and Close (or Cancel) to exit the window.
12

Right-click the Maven project and verify that the TestNG option appears in the context menu, confirming that TestNG has been successfully integrated with the project and is ready for creating and running TestNG test cases.
13
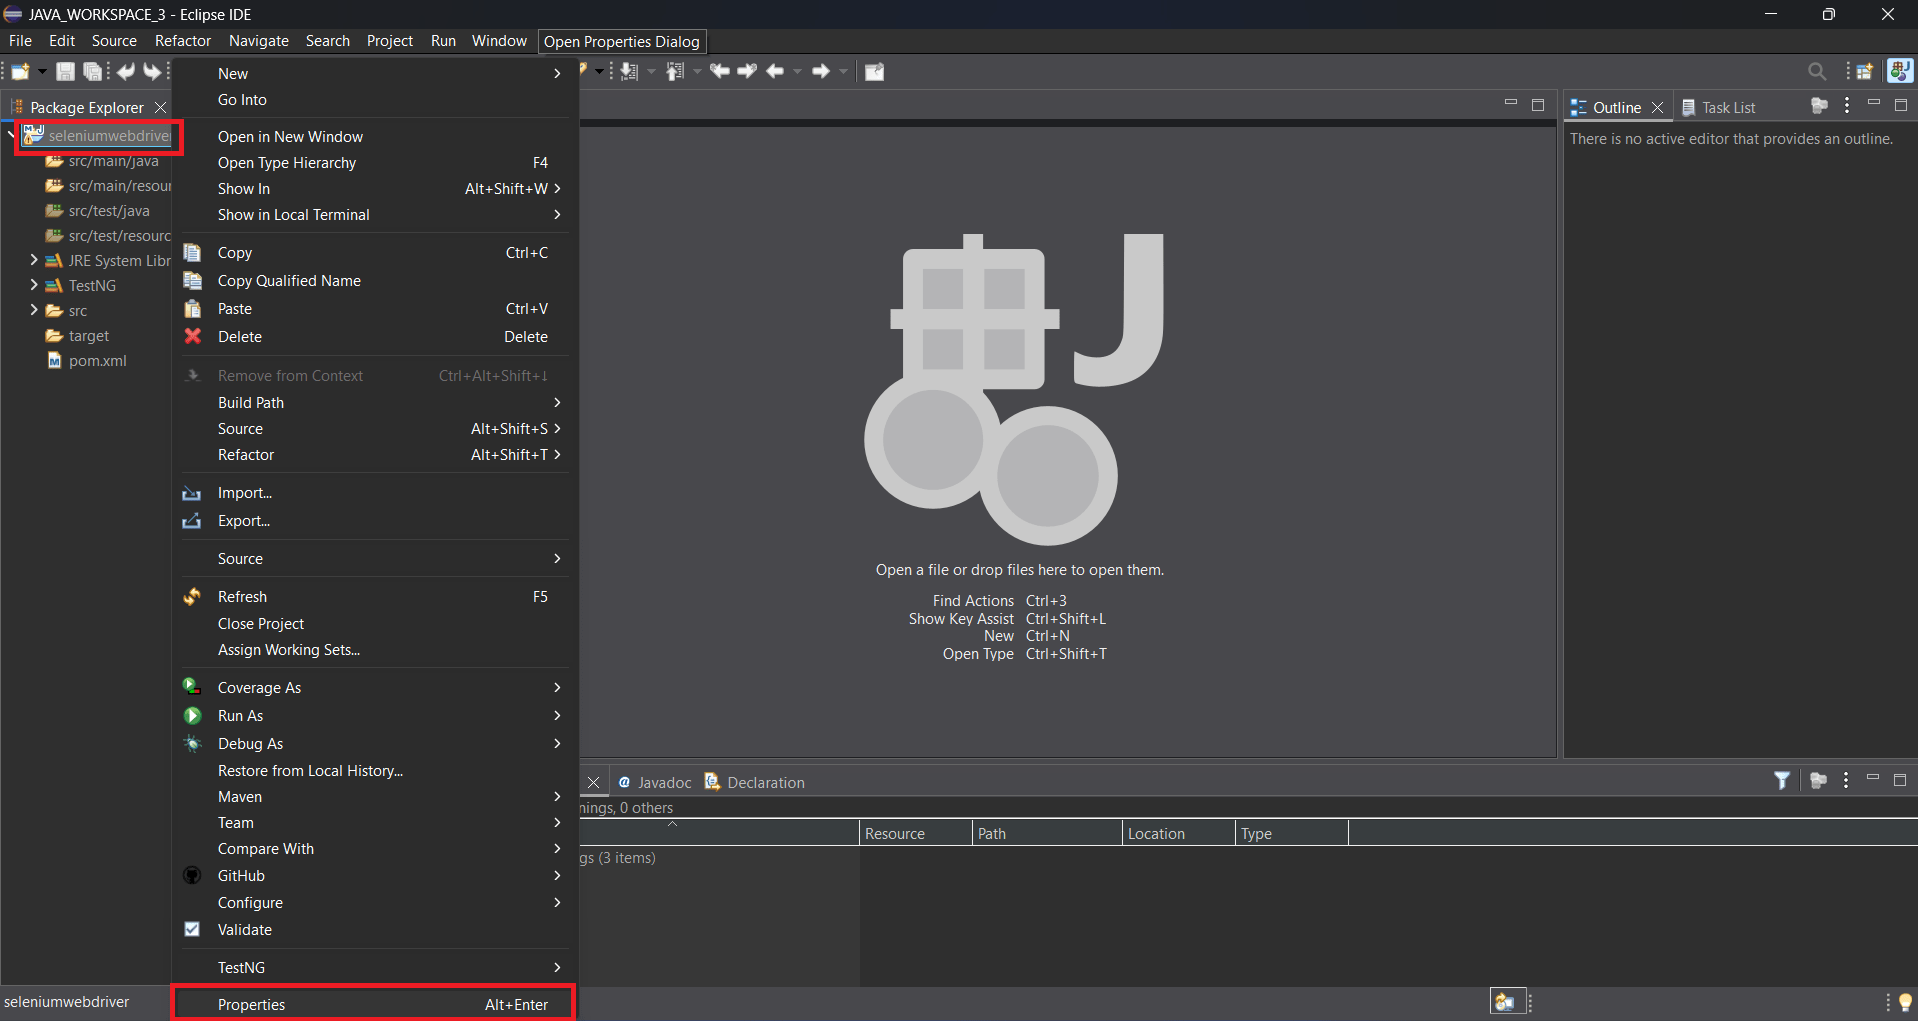
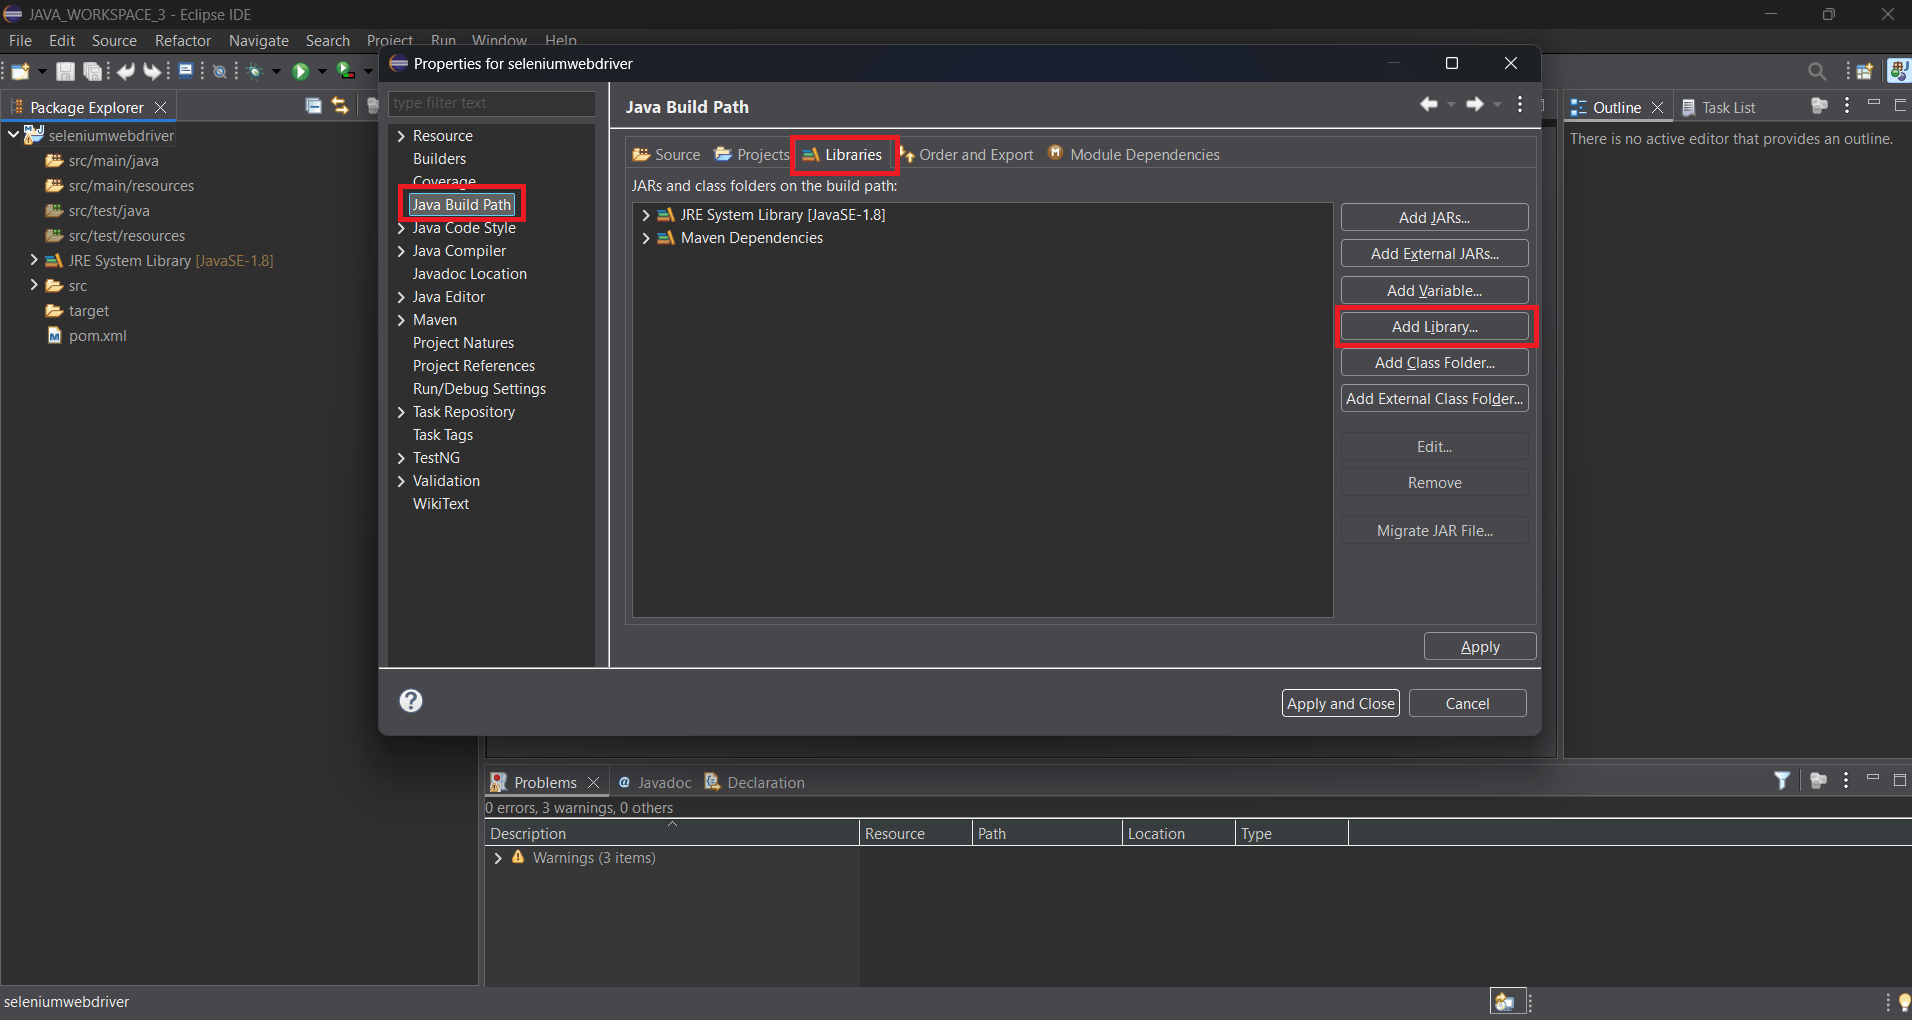
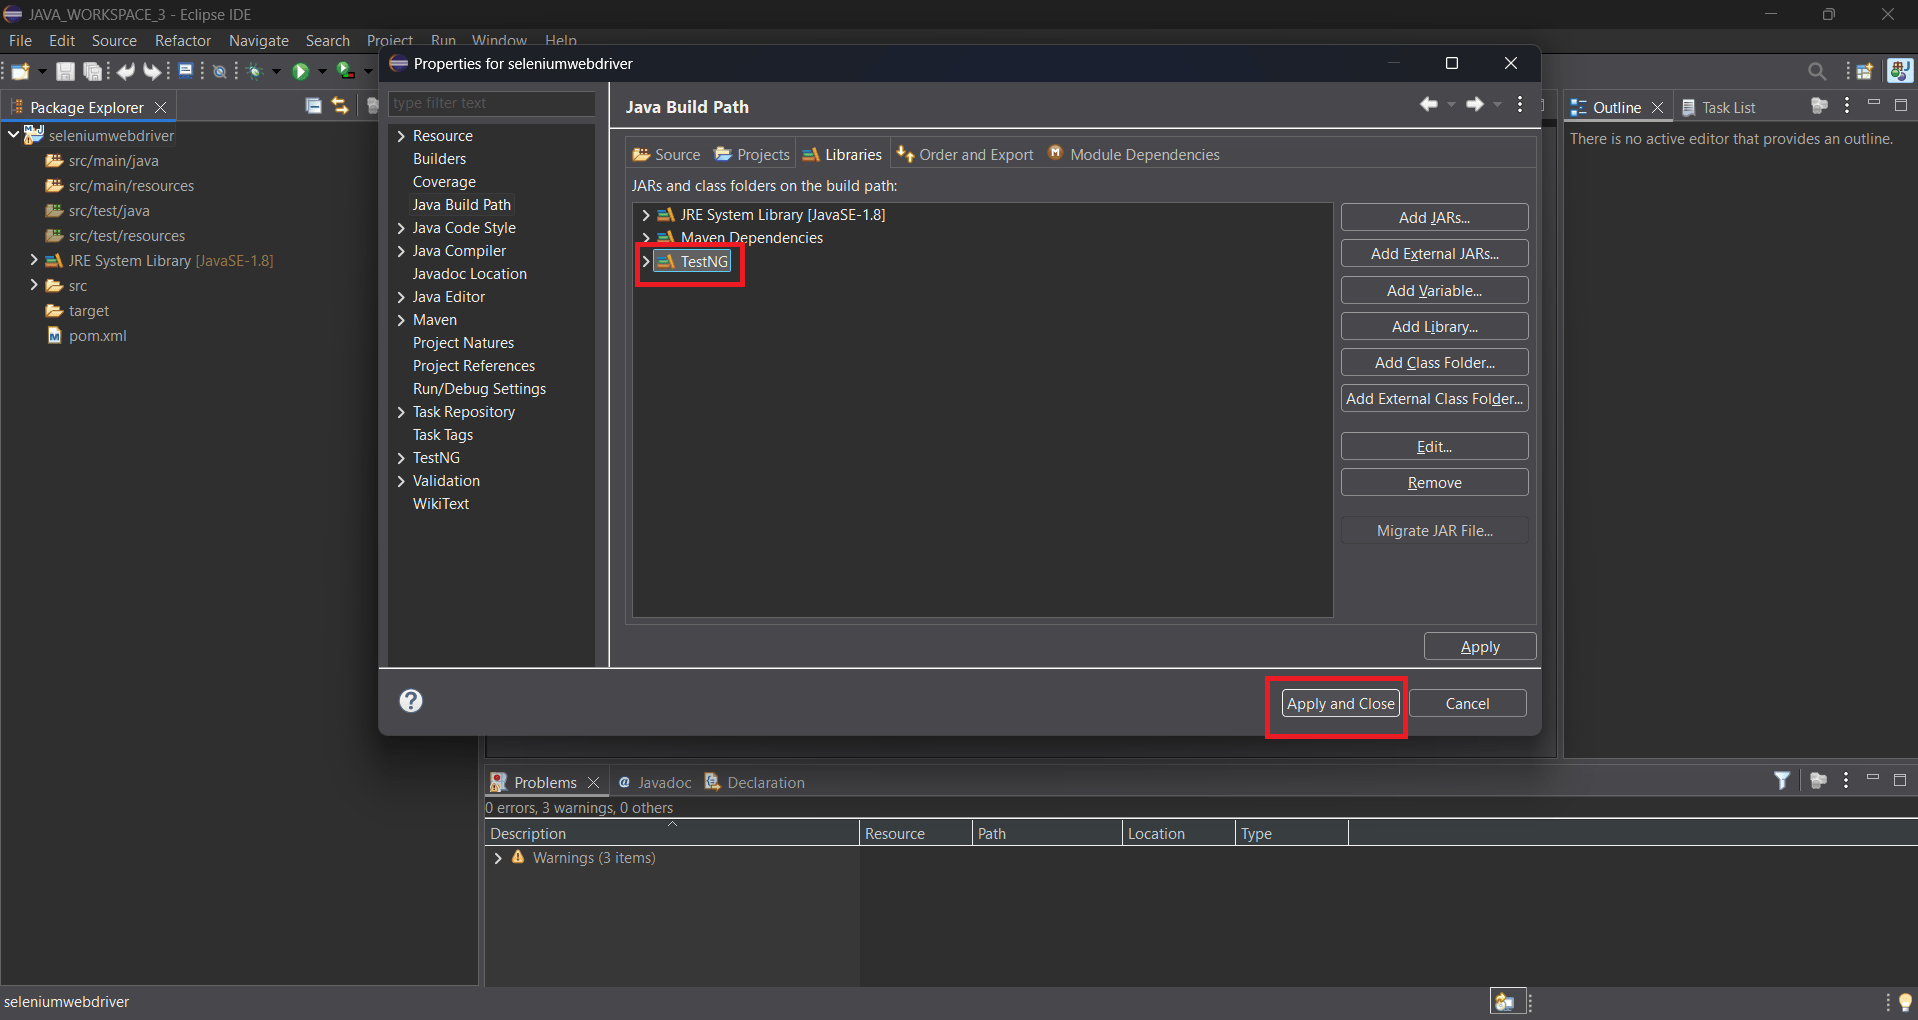
In the project Properties window, select Java Build Path, open the Libraries tab, and click Add Library to add additional libraries such as TestNG to the project's build path.
14
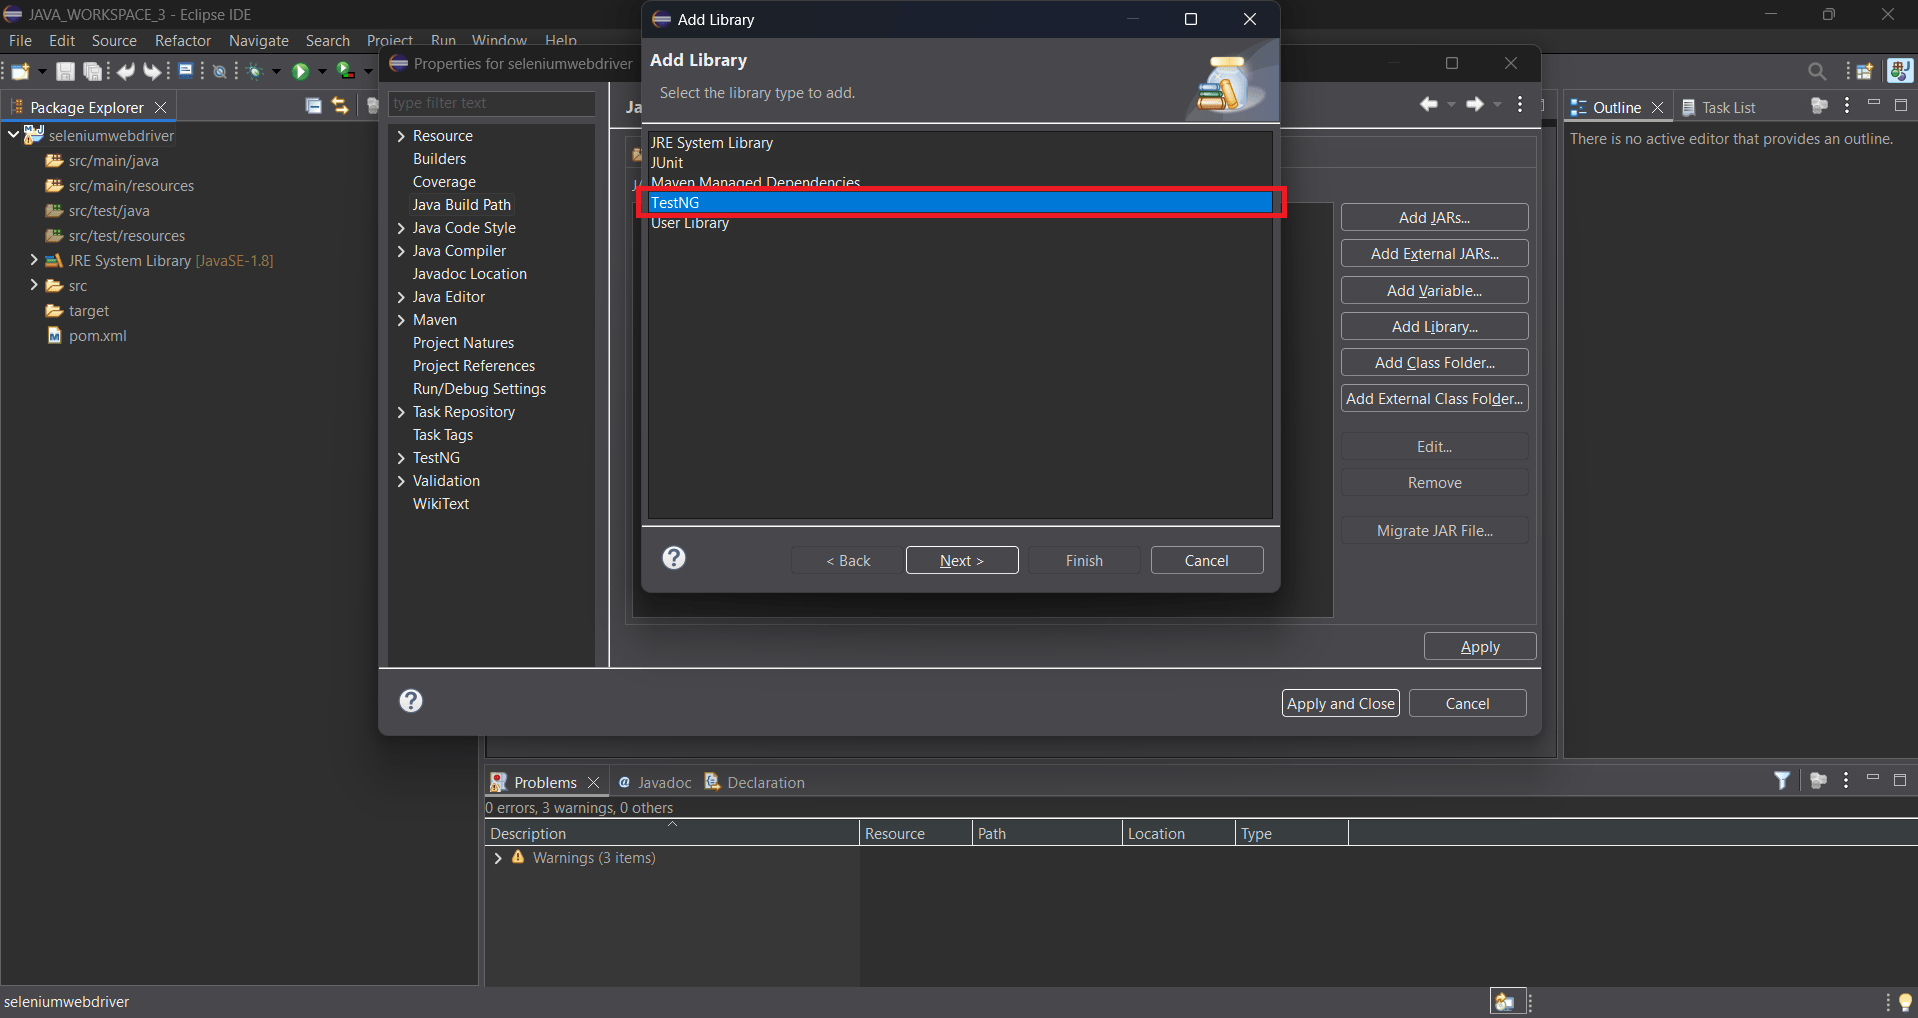
In the Add Library window, select TestNG from the list of available libraries and click Next to add the TestNG library to the project's build path.
15
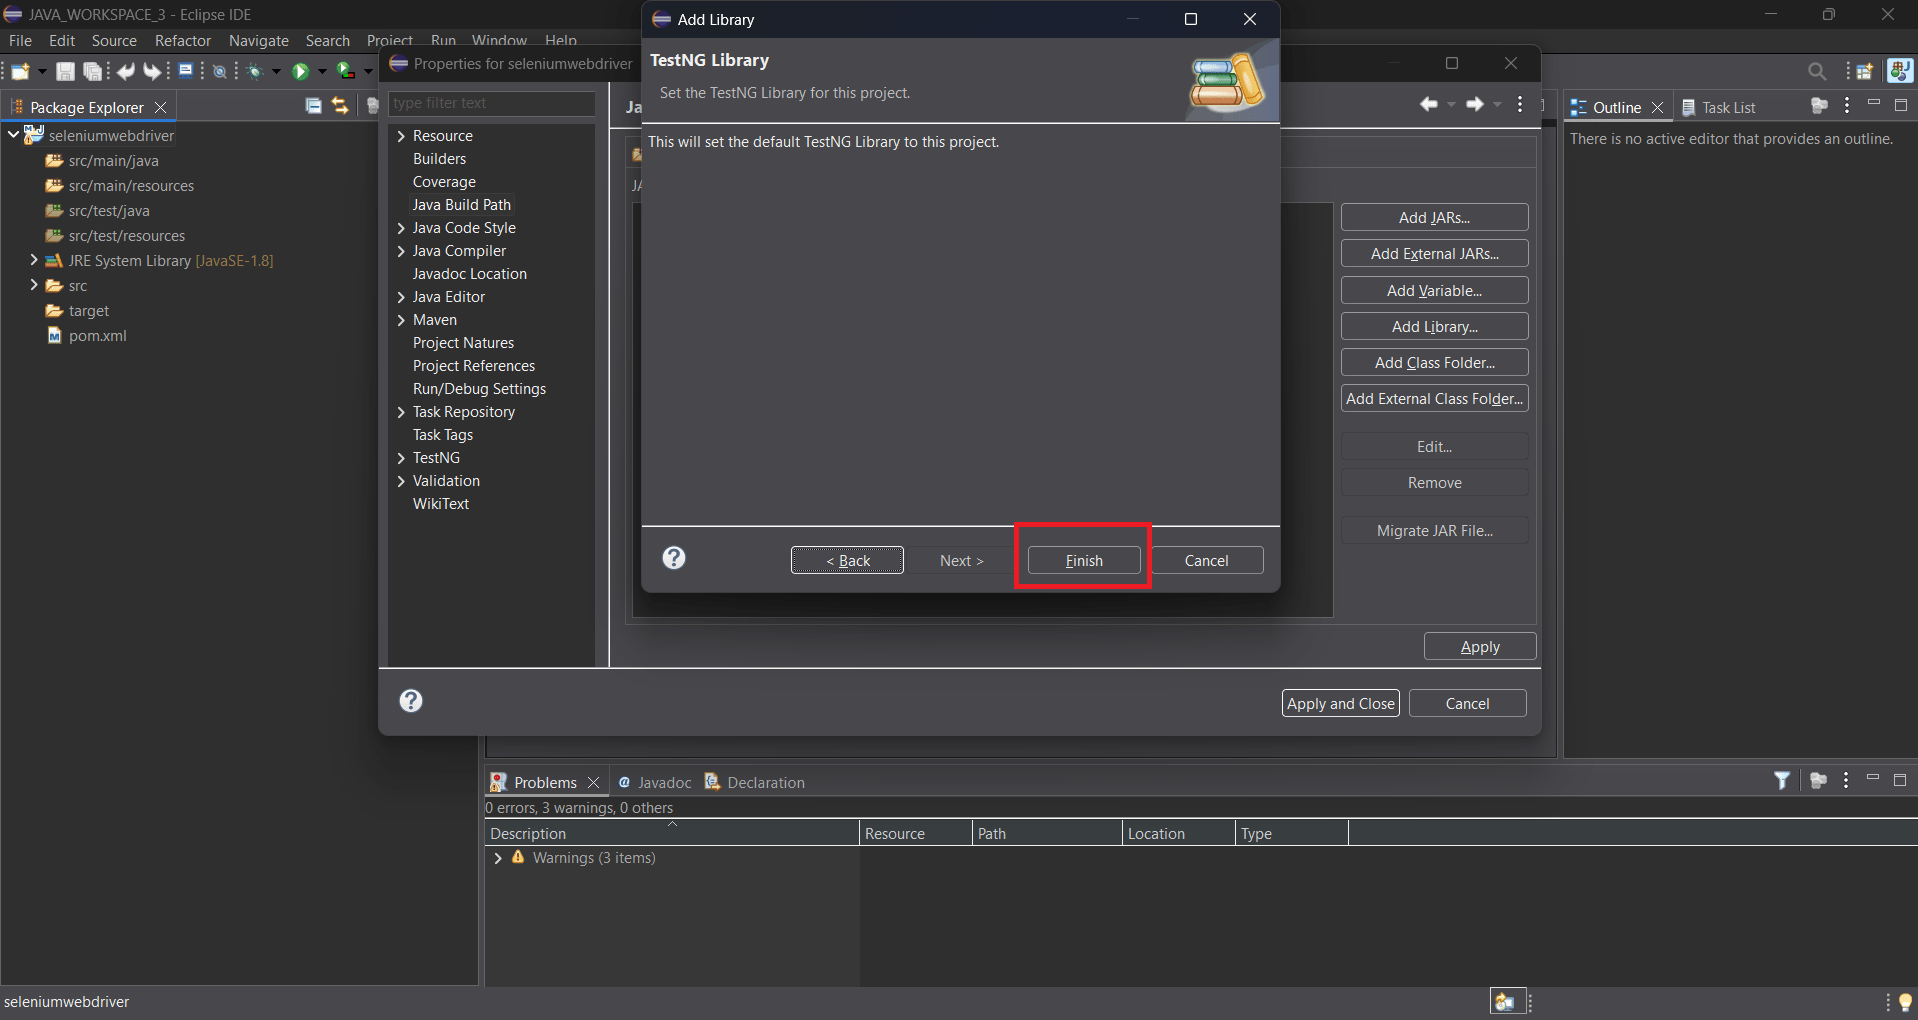
In the TestNG Library window, click Finish to add the default TestNG library to the project, enabling TestNG annotations and test execution support within Eclipse.
16
Verify that the TestNG library appears under the Libraries section in the Java Build Path, then click Apply and Close to save the changes and complete the TestNG setup for the project.
17
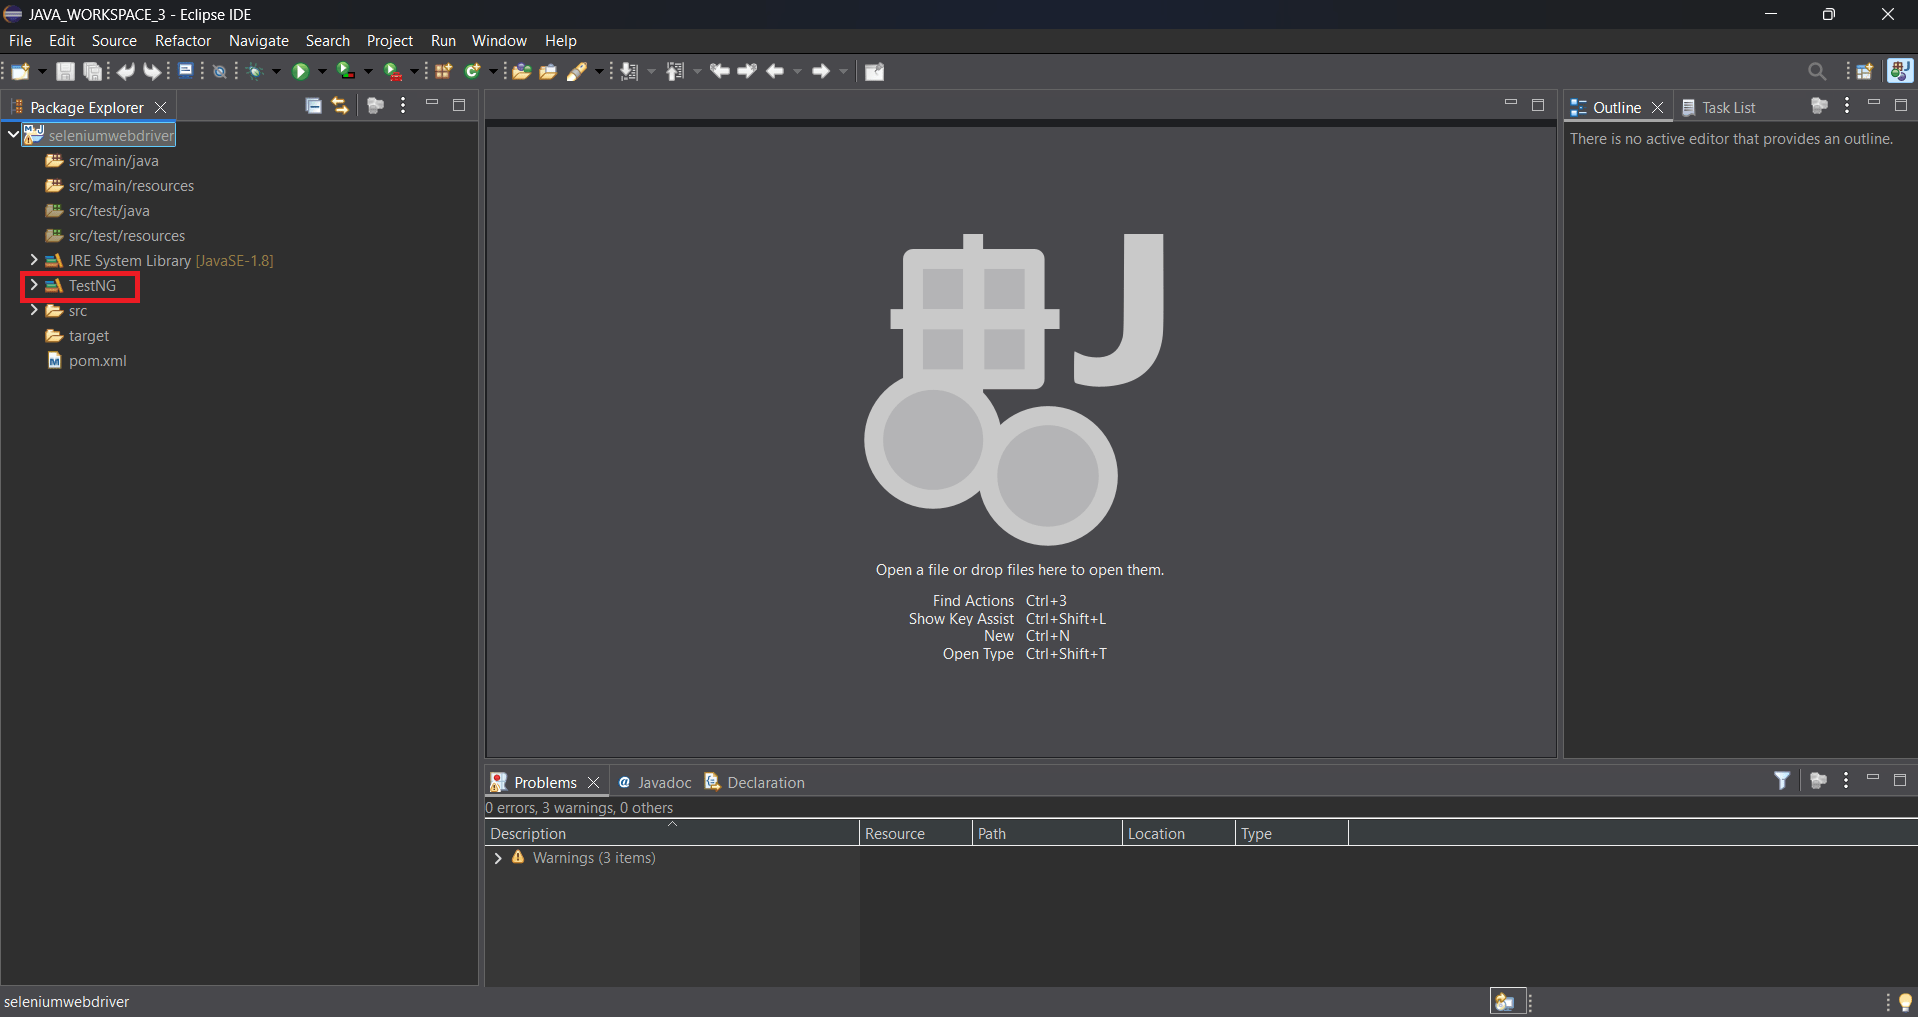
Verify that the TestNG library appears in the Package Explorer under the project, confirming that TestNG has been successfully added and is ready to be used for creating and executing TestNG test scripts.
18
Create a TestNG Class
19
-
Right-click on the src/test/java folder.
-
Select New → Class.
-
Enter class name as LoginTest.
-
Click Finish.
Write a Simple TestNG Script
20
-
Import the TestNG annotation package.
-
Create a test method using the @Test annotation.
Example:
import org.testng.annotations.Test;

public class LoginTest {

   @Test
   public void loginTest() {
       System.out.println("TestNG Configuration Successful");
   }
}
Run the TestNG Test
21
-
Right-click on the class file.
-
Select Run As → TestNG Test.
-
Observe the execution result in the Console and TestNG results window.
import org.testng.annotations.Test;

public class LoginTest {

   @Test
   public void loginTest() {
       System.out.println("TestNG Configuration Successful");
   }
}
Verify Test Execution
22
-
Check whether the test case executes successfully.
-
Verify that the status shows PASSED in TestNG results.
Generate TestNG Reports
23
-
After execution, refresh the project.
-
Open the test-output folder.
-
View index.html report for execution summary.
Create a New TestNG Class
1
-
Right-click on the src/test/java folder.
-
Select New → Class.
-
Enter class name as LoginTest.
-
Click Finish.
Task 2: Write test cases using annotations
Import Required Packages
2
-
Import Selenium WebDriver and TestNG annotation packages.
Create Setup Method Using @BeforeMethod
3
-
Create a method to launch the browser before executing the test case.
Example:
import org.openqa.selenium.WebDriver;
import org.openqa.selenium.chrome.ChromeDriver;
import org.testng.annotations.AfterMethod;
import org.testng.annotations.BeforeMethod;
import org.testng.annotations.Test;
@BeforeMethod
public void setup() {
System.setProperty("webdriver.chrome.driver", "path_of_driver");
driver = new ChromeDriver();
driver.get("https://traveltest.com");
}Create Setup Method Using @BeforeMethod
4
-
Write Test Case Using @Test Annotation
Example:
@Test
public void loginTest() {
   System.out.println("Login Test Executed Successfully");
}
Create Browser Closing Method Using @AfterMethod
5
-
Close the browser after test execution.
Example:
@AfterMethod
public void closeBrowser() {
   driver.quit();
}
Execute the Test Case
6
-
Right-click on the class file.
-
Select Run As → TestNG Test.
Verify Test Execution
7
-
Check the Console output and TestNG results.
-
Confirm that the test case status shows PASSED.
@AfterMethod
public void closeBrowser() {
   driver.quit();
}
View TestNG Report
8
-
Open the test-output folder generated after execution.
-
Open index.html to view the execution report.
Create Multiple TestNG Classes
1
-
Create separate test classes, such as LoginTest and SearchFlightTest.
-
Add test methods using the @Test annotation in each class.
Example:
Task 3: Execute test suites
Create TestNG XML File
2
-
Import Seleni
-
Right-click on the project.
-
Select New → File.
-
Enter file name as testng.xml.
-
Click Finish.
-
um WebDriver and TestNG annotation packages.
@Test
public void loginTest() {
   System.out.println("Login Test Executed");
}
@Test
public void searchFlightTest() {
   System.out.println("Flight Search Test Executed");
}-
Import Seleni
-
Right-click on the project.
-
Select New → File.
-
Enter file name as testng.xml.
-
Click Finish.
-
um WebDriver and TestNG annotation packages.
Configure Test Suite in XML File
3
-
Add suite and test details inside the XML file.
Example:
<!DOCTYPE suite SYSTEM "https://testng.org/testng-1.0.dtd">

<suite name="TravelTestSuite">
   <test name="TravelTestCases">
       <classes>
           <class name="testcases.LoginTest"/>
           <class name="testcases.SearchFlightTest"/>
       </classes>
   </test>
</suite>
Save the XML File
4
-
Press Ctrl + S to save the testng.xml file.
-
Verify that the file is available in the project directory.
<!DOCTYPE suite SYSTEM "https://testng.org/testng-1.0.dtd">

<suite name="TravelTestSuite">
   <test name="TravelTestCases">
       <classes>
           <class name="testcases.LoginTest"/>
           <class name="testcases.SearchFlightTest"/>
       </classes>
   </test>
</suite>
Run the Test Suite
5
-
Right-click on testng.xml.
-
Select Run As → TestNG Suite.
Observe Test Execution
6
-
Check the Console window for execution details.
-
Verify that all test classes execute sequentially.
Verify Test Results
7
-
Open the TestNG results tab.
-
Confirm that all test cases show PASSED status.
Open Existing TestNG Class
1
-
Open the previously created TestNG class in the TravelTest project.
-
Identify multiple test methods for execution.
Task 4: Manage test priorities
Create Multiple Test Methods
2
-
Create different test cases, such as login, search for a flight, and logout.
Example:
@Test
public void loginTest() {
   System.out.println("Login Test Executed");
}

@Test
public void searchFlightTest() {
   System.out.println("Search Flight Test Executed");
}

@Test
public void logoutTest() {
   System.out.println("Logout Test Executed");
}
Assign Priorities to Test Cases
3
-
Add the priority attribute inside the @Test annotation.
-
Assign lower numbers for higher execution priority.
Example:
@Test
public void loginTest() {
   System.out.println("Login Test Executed");
}

@Test
public void searchFlightTest() {
   System.out.println("Search Flight Test Executed");
}

@Test
public void logoutTest() {
   System.out.println("Logout Test Executed");
}
@Test(priority = 1)
public void loginTest() {
System.out.println("Login Test Executed");
}
@Test(priority = 2)
public void searchFlightTest() {
System.out.println("Search Flight Test Executed");
}
@Test(priority = 3)
public void logoutTest() {
System.out.println("Logout Test Executed");
}
Save the Test Class
4
-
Press Ctrl + S to save the updated test class.
@Test(priority = 1)
public void loginTest() {
   System.out.println("Login Test Executed");
}

@Test(priority = 2)
public void searchFlightTest() {
   System.out.println("Search Flight Test Executed");
}

@Test(priority = 3)
public void logoutTest() {
   System.out.println("Logout Test Executed");
}
Execute the Test Class
5
-
Right-click on the class file.
-
Select Run As → TestNG Test.
Observe Execution Order
6
-
Check the Console output.
-
Verify that test cases execute according to assigned priorities.
Verify Test Results
7
-
Open the TestNG results tab.
-
Confirm that all test cases execute successfully with PASSED status.
View TestNG Report
8
-
Refresh the project after execution.
-
Open the test-output folder.
-
Open index.html to verify prioritized test execution details.
Great job!
You have successfully completed the FinCheck Data Extraction & Comparison Techniques session.
Learned how to extract datasets from databases, compare expected vs actual data, identify mismatches, and document discrepancies for accurate financial data validation.
Checkpoint
Great job!
You have successfully completed your lab on “TravelTest TestNG Framework Setup” where you have learned how to configure the TestNG framework in a Selenium project, create test cases using annotations, execute test suites through XML files, and manage test execution priorities. You also gained practical knowledge of organizing automated test execution and generating TestNG reports for the TravelTest application.
.
Checkpoint
Next-Lab Preparation
Git Push
git push origin branchNameTopic:
1)Project Structure
2)POM.xml Configuration